Sourcing the architect

Studio oil painting Toni BI always knew it would come to this. In the end, given my preference for using Dylan McPherson’s company to build our home, we’re going with an architect who has worked with him before and who trusts Dylan’s excellent product. This architect was coincidentally a sound engineer in a former life so knows and gets musicians and understands my need for a sound proofed room that still resonates on the inside.

He’s not afraid to put together some new ideas for us too, seeing as I want a complete renovation plan prior to building the first stage. There is (as he put it) so much potential for our house, and if we plan carefully we should have a wonderful end result.

His fees are reasonable and he works by the hour. This is good for us as once those plans are in place he can step back and our designer Lisa can step in as liaison between the relevant parties.

This whole process is very crazy but not as far as I can tell unusual. And renovating our home is STILL preferable financially to buying elsewhere. Sigh.

In other news the new art is now in the house and for Xmas my mum gave me a rather gorgeous oil painting by Toni Bucknell of a studio I have always liked. I was surprised when she asked what I wanted from her house, but it appears she’s divesting herself of some stuff. When I said I liked that picture she thought for a moment and then said: yes. None of the other siblings wanted it. It’s not worth much I think but I love it as a reminder of my childhood. So it’s in our kitchen, bright and cheerful and we’re nearly done with all my own paintings (done in high school!). The last remaining similarly cheerful print of a kitchen table is about to go to another happier place in the undercroft.


The plans, the plans!

Waiting, waiting. In the meantime, I’ve changed the appearance of the blog for funsies. I’ve come up with some lovely plans, courtesy of my designer, who has shown all sorts of good ideas. Not sure we can afford a single one, but here’s hoping.

Here are some plans I’ve recently played with. The first highlights upstairs and the second downstairs. DH and I desperately want a back deck and extension to our home as we currently have nothing there. I also want a separate studio (with toilet) for my students. The next thing is garage, extra bedroom and bathroom and laundry. And as I mentioned in a previous post, our garden is an interesting jungle design at present and I want to create a back yard oasis – but not until the builders have finished with it first. As our house sits on an 810sqm block, we really don’t have too many limits in the first 20 metres – it’s only the back half of the block that easements are our pest. Our designer talked about going downstairs which works for us, but as we also want to extend the back, it makes sense to me to discuss and plan the next phase before launching headlong into the first phase. But we also need to finalise plans for the front so that when we go to council it’s all there ready to go.


Document4Document3

We’re renovating!!!

My designer reported last week that a “pool” house at the bottom of the garden was not possible given the stupid amounts of fees that would be required to relax easement coverage. While we were all disappointed, she visited today and came up with something even better: we’re going under!!

Our house sits on a sloping block and the bottom section of the house (the garage) is legal height. The builder has a brother who owns an earth moving business – it seems we will be able to excavate under the house another three metres or so and put in a double garage, bedroom, bathroom and laundry, linked by a staircase in the little anteroom off the kitchen. The earth moving won’t have to go in more than 3m x 10m by about .6 metres deep, so it’s totally doable, once we replace the posts with a steel H beam. Huzzah!!!!! This is what I had ALWAYS wanted to do, but I thought it would cost more than the figures being bandied about at present. This is due to the great floods of water running through the house, which will require rather a lot of hard landscaping work. I think we will end up with a cost of about $120,000 for all the plans we have but we can cover that with all sorts of spare credit cards if need be. Our bills aren’t going up and DH’s income is set to rise in the next 12 months or so. With any luck so will mine! We won’t be able to build all the lovely jubbly cabinetry I want for a little while, I imagine. But once we’ve got the changes to the house done and informed the bank of the upgrades, we should get some more money to finish the remainder, as presumably the house will go up in value.

Not only that, the designer recommended we build a studio with a skillion roof off the eastern side at the front of the block, where the current skillion entryway is now. If we offset it and don’t go to the boundary – in other words following all regulations – we can fit a 3.5 metre x 6m addition alongside the current house – perfect for the studio and away from the main house, with an entryway at the front. We place lovely new (but old style) stairs to the front of the house, thus giving us a proper four bedroom house with a front verandah, separate studio entry and double garage. I cannot tell you how excited we are. Very excited. OMGOMGOMG. AAARRRRGGGHH!!!!

And now I want to draw it.


Darn the bank – I want my renovation!!

I’m planning a return to the stage with a friend who’s writing a seminar on happiness, which amongst other things suggests that happiness is not something that can be attained through the pursuit of it, and that having stuff won’t make us happy. This is so true, however, I’m pretty sure that I’ll be a lot more cheerful when the bank gives us money to do much needed renovations to the house!

At present we’re aching for lots of things, such as wardrobes. Or a quiet teaching space. Or a parental retreat. Or painting the exterior, getting a new fridge and oven (aka kitchen); or even getting more storage and an upstairs laundry. These things, I’m pretty sure, won’t make me happy, but I’ll no doubt feel I can entertain again once I can cook on a better stove.

So, a few weeks ago we went to the bank to enquire about extending our mortgage, given that interest rates have dropped and we won’t be over extending ourselves. Computer said, well, ok, just not very much. Not enough to do the “you-beaut” extension, just a little teensy-weensy pretend renovation. We’re going to have to do this $20,000 at a time, clearly. I wanted $120,000 but they said, no, you can only have $80,000. Thanks. Thanks so much. What can you do with $80,000 when we clearly need a new teaching room (multi-purpose room), bathrooms and a parental retreat with storage?

Well. No new bathrooms this year, and certainly no new storage yet. But perhaps we can repair and paint the exterior, replace the old rattly louvres at the front of the house with new double-glazed casement windows, rejig some of the interior doors into our bedroom, and build a new teaching room down the bottom of the garden (also known as the pool room/teenage retreat) that will house all the books, my studio equipment, and the sofa bed for guests. Once most of the bookcases are out of the way, then we can plan proper storage for the remaining things. Like the pantry. Or some wardrobes for me and the DH.

Here are some images of back-yard rooms that I rather covet. The one below is too small for my needs but I like the colours and the cute verandah:teen-retreat1

This one below has a nice set of doors but I hate the natural wood look. Who am I, a lumberjack? I do love natural wood but not all over the house, thanks.

display-image-office-garden

The following is just plain cute with a hideaway look:

Back yard studio

In the end, though, I covet and clearly need a room that is large enough to teach in but small enough not to overwhelm the back garden. I had drawn up some plans which are super simple but my mum reminded me that I would need to think about where to place the sofa bed if I covered the entire length of the back wall in bookcases. In other words, which wall would need to be free for this sort of stuff? (Personally, could not care less about housing people – I just want all the books in one place!). So the plans below are still in concept phase 1. I’m still waiting to hear from my designer and the bank. Once these two missing pieces of the puzzle are in place then it’s all systems go!

House Plans P30

I have some room design preferences in addition to a simple kitchenette and teensy bathroom. The first is cathedral ceilings with white-painted beams and timber tongue-and-groove-style ceiling cladding. I’ve always loved this look but it needs to be carefully done so it doesn’t end up looking cheap. The second is painted wooden cladding on the exterior – I’ve been told that treated pine planks are fit for purpose and not too expensive. The third is a clerestory window in the gable of the roof. Not sure on cost for that. Then add a covered verandah and an extended deck surround for entertaining. Then paint the interior white, with LED down-lights and VJ walls (not a fan of plaster any more, having lived in houses with VJ walls for 8 years). Then decorate in an industrial-country style. I found a good quality vinyl flooring that looks like timber but is soft underfoot and doesn’t have that hollow clicking sound when you walk on it. Not as gorgeous as true timber flooring but a lot better than click-timber floors. Which I hate. I also hate tiles in living areas, so none of that either. Which leaves me with either carpet (no – not in this climate, also it’s too deadening re sound) or vinyl. I also love polished concrete, but computer says don’t be silly. Multifold doors for outdoor-indoor living, and Bob’s-your-uncle. Add some very basic landscaping (trees and lawn, path and lighting) and we’re done all bar the furnishings.

Pinterest addiction (affliction?!) and the perfect master bedroom

I’ve become a little bit addicted to Pinterest. Pinterest is for people like me who have house-porn fetishes. I’ve discovered my style is an amalgam of Hamptons, warm, cozy British library, industrial vintage, French city elegance, collector’s corner and a touch of Scandi cool for DH’s study. I love colour but love muted neutrals too. I hate hate hate slick Italian moderne, glamorous shiny, or “easy care modern living”. Give me visual delight and clutter any day, as long as the floor and surfaces are clean and furniture is not too close to move the vacuum around. I’m suspicious of fads, even when I love them, such as those tall glass cake covers/stuffed animal protectors, because I think they may fall out of fashion pretty quickly, and then what do you do with a big glass thingy? I also love Steampunk style, which is a dense visual display of 19th century rusting industrial design such as watches and cameras and old implements and clothing and a big whack of neo-gothic romance. It’s too busy to have in the house but I can see that hanging paintings via gallery walls (aka salon style) might be good for the style. And the occasional occasional table.

I’ve been browsing Pinterest to help plan my dream spaces. It’s like working with mood boards and magazines except online. Totally addictive. I’ve found lots of interiors I love, particularly kitchens and laundries and bathrooms (because none of ours are any good), but rather fewer master bedrooms. Perhaps that’s because I have such a strong design sense for this space already. Our bedroom is perilously close to being “perfect” in my eyes. The room is a reasonable 3.6 metres by 4.2 metres, and we have a large “sunroom” to the left which we use as a sitting room when the children aren’t here. We don’t have a WIR or ensuite yet. That is a sad, sad story for another day.

The walls are a peaceful sand with white ceilings and our bed linen is Florence Broadhurst Egrets in a striking blue and red pattern which both DH and I loved on first sight:

IMG_2606

The nude drawing above the bed I bought from an artist friend, and I’ve started collecting blue and white Chinese-style pots to put on the mahogany chest of drawers because they look lovely against dark wood. I’d like to create a gallery wall but DH is a little bit overwhelmed by home clutter at times so I might have to leave the gallery wall for the powder room (aka the dunny). We have a suitable wall space next to my side of the bed, but given the amount of stuff in the room already I think DH would go crazy! Plus my side of the bed is a bit squeezy. I might have trouble getting past the hangings.


IMG_2588

At present there are two separate sets of French doors on opposite walls, plus a big window on the third wall, plus a nursery door on the fourth and final wall. We have a queen-sized tassie-oak 1920s-style bed, 2 restored 1920s vintage bedside tables, 2 large vintage chests of drawers, a vintage wooden chest, a vintage chair in navy velvet (I’ve wanted to get this chair re-covered for 20 years, now I don’t have to because now it’s back in fashion!), and a lovely blue-covered antique corner chair my mother restored. It’s awfully busy, plus there’s a laundry basket in the corner. If we keep the room as our bedroom we’d like to remove one of the French doors (saving and restoring it for the back rooms) so that we have a better use of space and more room around the bed. We’d then put in plantation shutters on the window as it cuts noise and would remove the visual clutter of the curtains  which are currently in for privacy, because they’re sure as hell no good for anything else!

House Plans P29-1

Because we are so pressed for storage we’re using the space under the bed for shoes. 2 old under-bed drawers on castors have been loaded up with shoes to try and declutter the room, given that we don’t own a wardrobe or linen closet or WIR or pantry or ANYTHING.

There are a couple of other things I’d like to get for the bedroom, including replacing the lovely but small bedside lamps with Chinoiserie blue lamps (the girls can each have one of the old ones, which are still in fashion but NQR for the space, and we’ll replace the shades with colours in their preference) and perhaps an old gilt mirror. DH says to me that for anything I buy one thing the same size has to go. I am not amused, but I can see why he would say that. I was raised by a hoarding mother who collects things. Lots of things. Lovely vintage things. Lots of lovely vintage things that need restoring. Luckily, I’ve been the recipient of some of those lovely things. Mostly restored. Some not.


The gods of small things

The gods of small things have shone on us this week. Our house is at the “touch me and I’ll break, I swear I will” stage, so everything’s held together by stick and cardboard. And in the case of Ikea, that’s quite good, really. My step daughter lost her room after my daughter moved up north, so we needed to get a space built for her, pronto. I think she actually trained us very well to get this done in a hurry: she uncomplainingly insisted she could manage on one of our camp beds for a while. But the camp beds are so small one’s feet hang over the edge and over the course of about 6 weeks she started to look so haggard I finally insisted she have her mattress on the floor, which she dutifully did. The next weekend her room went in.

Thanks to Dylan McPherson of McPherson Constructions here in Brisbane and all his worker bees, they did a great job at a very reasonable rate, too. We’ll choose them again!

Now, her room is a tad teensy weensy, so she chose what I would call a monstrosity of a bunk bed. It has all its storage underneath the bed itself and it’s a hulking great thing that dwarfs her tiny room. We painted her room vivid white, but didn’t realise we’d need to fill all the vj joists with filler (the old colour was a dark grey which hides all the shadows), so it looks a wee bit patchy. Still, it’s already much better for her and she’s much happier now she’s off the floor and into her own space.


IMG_2568

We’ve begun decorating it in the colours she likes of pink, purple and turquoise. It’s looking bright and cheerful, even if it missing a bit of chair comfort – sadly, there’s nowhere to put a comfy chair. IMG_2563She’s very into crisp, clean, modern styles, which I hate, but even I have to admit her room is looking very sharp and fresh. The colours are great, too.

IMG_2561


The other thing that’s been happening of late is that our plumbing is starting to go. Not in a “OMG the toilet’s blocked up and it’s a holiday weekend”  kind of way, more in a “hmm, we seem to be losing pressure in our shower and all our taps are falling off and there’s a blocked drain” kind of way. So last week we got the plumber out and he fixed it all up for us, even gave us a new front tap for the front yard as the old one was all blocked with rust. He repaired all the taps and fixed the shower pressure (who knew water limiters could fail so spectacularly after only 2 years?) and then he tackled the blocked drain. It’s a grey water drain that’s supposed to go into the sewer line but it wasn’t working. So he blasted it with high pressure water and discovered…it goes nowhere. The pipe doesn’t exist. There is no drain. Our grey water from the shower seeps into the ground. Ew. Anyway, it will all need replacing soonish because there was also a leak because all the galvanised pipes are kaput -held together literally with plumber’s tape. Hmm. But he fixed what he could, nice, kind plumber George.

But! You know something, we can live with it for another 6 months or so because I think DH is getting to the point of no return. We’ve started obsessively looking at houses again. We saw a couple of beauties today, and in particular this one:

http://www.realestate.com.au/property-house-qld-norman+park-116886567

DH wants a haven to come home to: a place where he can prop his feet up on the back deck and suck down a beer. Which is something he’s NEVER done, but hey! More importantly, he wants a sanctuary. Which we currently don’t have because our house is on a busy road and we have no back deck.

We also have a terrible bathroom and our west wing is appalling and our house is hot and has no insulation and our electricity is about to go and, and, and…

Should we stay or should we go?

Oh my. A big decision indeed. DH and I are trying to decide whether to stay put at Chez Harry’s and fully renovate the old dear or whether to pull up stumps and move back a couple of streets to a quieter locale with a fully renovated house for a couple of $$ more. That would a couple of hundred THOUSAND more.

You see, it’s like this. We now have my adult daughter (formerly a he) living with us as she goes through her transition. She is unlikely to leave for a couple of years given her mental health issues and various needs. Cool. We also have 2 younger children who need their own spaces during the times they stay with us – they might also want to live with us in future while they are studying.  Also cool. Then, there might be grandchildren. And happy families visiting. I think we’ve got about 15 years where we will need to have a larger house for extended family, maybe longer.

The other thing is, our income has grown rather nicely in this time. So much so that we could actually afford to move back a few streets. We could also renovate. Given what we’ve seen around, the chance of doing either is pretty high. Unfortunately, we are on a busy street and the cost to renovate our home may not match the eventual value. Something about borrowing and liability and potential recouping of value etc etc. At one point I spoke to the bank and while they were happy to lend money for some small projects they weren’t quite as happy to extend a decent renovation budget to do all the things needed to bring the house up to date.

I’ve provided a pretty picture of our house plans for your edification with the West Wing showing sunroom, robe (Hah!) and bathroom and the front of the house showing the office and master bedroom. East Wing currently has a porch on it and the back of the house has the current toilet, bed 1, kitchen and dining rooms.

House plans 2014

Here’s the list, in no special order, of what we’d like to fix/add/update, in sections.

1. FRONT of house, and whole exterior

  • Add porch and stairs to front of house for central entry, shaped with original 20s features
  • Add open carport and electric garage door for under the house
  • Concrete the carport and entryways, create side path on low side
  • Replace louvre windows with laminated hopscotch windows, repair all wooden windows
  • Paint and fix exterior walls and replace window shades with new
  • Landscape garden to include hedge and new trees
  • Exterior lights on porch and round the side – timer activated

2. Office and misc rooms

  • Shell interior office and insulate all interior walls and ceilings; replaster and paint
  • New front door and entryway
  • Replace lights and powerpoints
  • Window shutter treatment

3. West Wing Sunroom

  • Shell and insulate all interior walls and ceilings; replaster and paint and insulate interior walls
  • Replace lights and powerpoints
  • Add permanent wall to create extra bedroom (or future study/ parental retreat/ walk-in-robe)
  • Replace aluminium windows with new wooden laminated windows
  • Exterior and interior window treatments – retractable awnings and interior shutters
  • Repaint
  • Carpet for sound insulation

4. West Wing Robe and Bathroom area

  • Repurpose the robe area to be a general utility area possibly with upstairs laundry OR open study zone
  • Replaster and insulate the room
  • Replace lights and powerpoints
  • Add built in desk area and bookcases
  • Repaint
  • Renovate the bathroom

5. Pantry

  • Built in storage including utility area
  • Add lights
  • Repaint
  • Add door
  • OR! Turn it into a stairwell…

6. Lounge

  • Built in bookcases, lights, repaint

7. Master bedroom

  • Shutter treatment for all windows and french doors
  • Repaint
  • Rewire powerpoints

8. REAR of house: all

  • EXTENSION!!!
  • Extend whole back of house by 4 metres. Reshape rooms and reorient living/kitchen areas to Western view.
  • New kitchen with butler’s pantry
  • Add new bathroom
  • Add powder room
  • Extend bedroom with ensuite and WIR (creating new master bedroom at rear of house)
  • Add 4m DECK!

9. Garden

  • Hard landscaping for water runoff
  • Remove old tree stumps
  • Re-lawn
  • Landscape in easy-care tropical style
  • Pool???
  • Poolhouse???

10. DOWNSTAIRS

  • Add rooms including rumpus, office, extra bedroom, laundry, bathroom

You see? There’s a LOT to consider. If we don’t go downstairs or add a poolroom we could probably do most of this, but even with the simplest jobs we need to replace all the electrics and pipes, as they are all on the fritz.

So, I guesstimate the front sections additions, relining, painting and West Wing revamp to cost about $70000 (that’s $1500 per square metre) which could easily be accommodated by the bank. It’s the back section that becomes interesting. And expensive. But now’s the time to think about it, because our plumbing is failing, our kitchen appliances are all dying simultaneously, and we have nowhere nice to sit of an evening (ie family room/back deck). And our garden is a den of weeds.


Do we stay or do we go? I love Harry’s place. But it’s groaning and sighing and telling us it needs some TLC and a pot of money thrown at it.


Faffing about fences

About 18 months ago, my beloved 14 year old beast of a Beagle, Boots, died when he escaped onto our busy road. He was an escapologist, as are all beagles, with no road sense. It was bound to be bad. Anyway, he was going to die either by car or by slow, lingering death of old age. I buried him in the back yard.

After an approved period of mourning – about 6 months, I decided it was time to think about welcoming another fur baby into the house. We did our homework and in January of this year welcomed Poppy into our lives. Poppy is a Groodle. That is, she is a Golden Retriever/Poodle Cross. She is black.

IMG_2404

I’m madly in love with Poppy, and she loves me. It’s magic. Anyway, the reason Boots our beagle had died was some idiot left the gate open and he escaped. I was determined not to let that happen again. So we planned and built several new fences in preparation for Poppy. She’s a very expensive dog. Our fence building project was finished in February this year, although painting continues.

Our builder was Chris Biancotti, and while he wasn’t hugely cheap, he was very patient with the crazy lady who kept changing her mind and he did a wonderful job. I had seen a fence he constructed just down the road and I admired his handiwork.

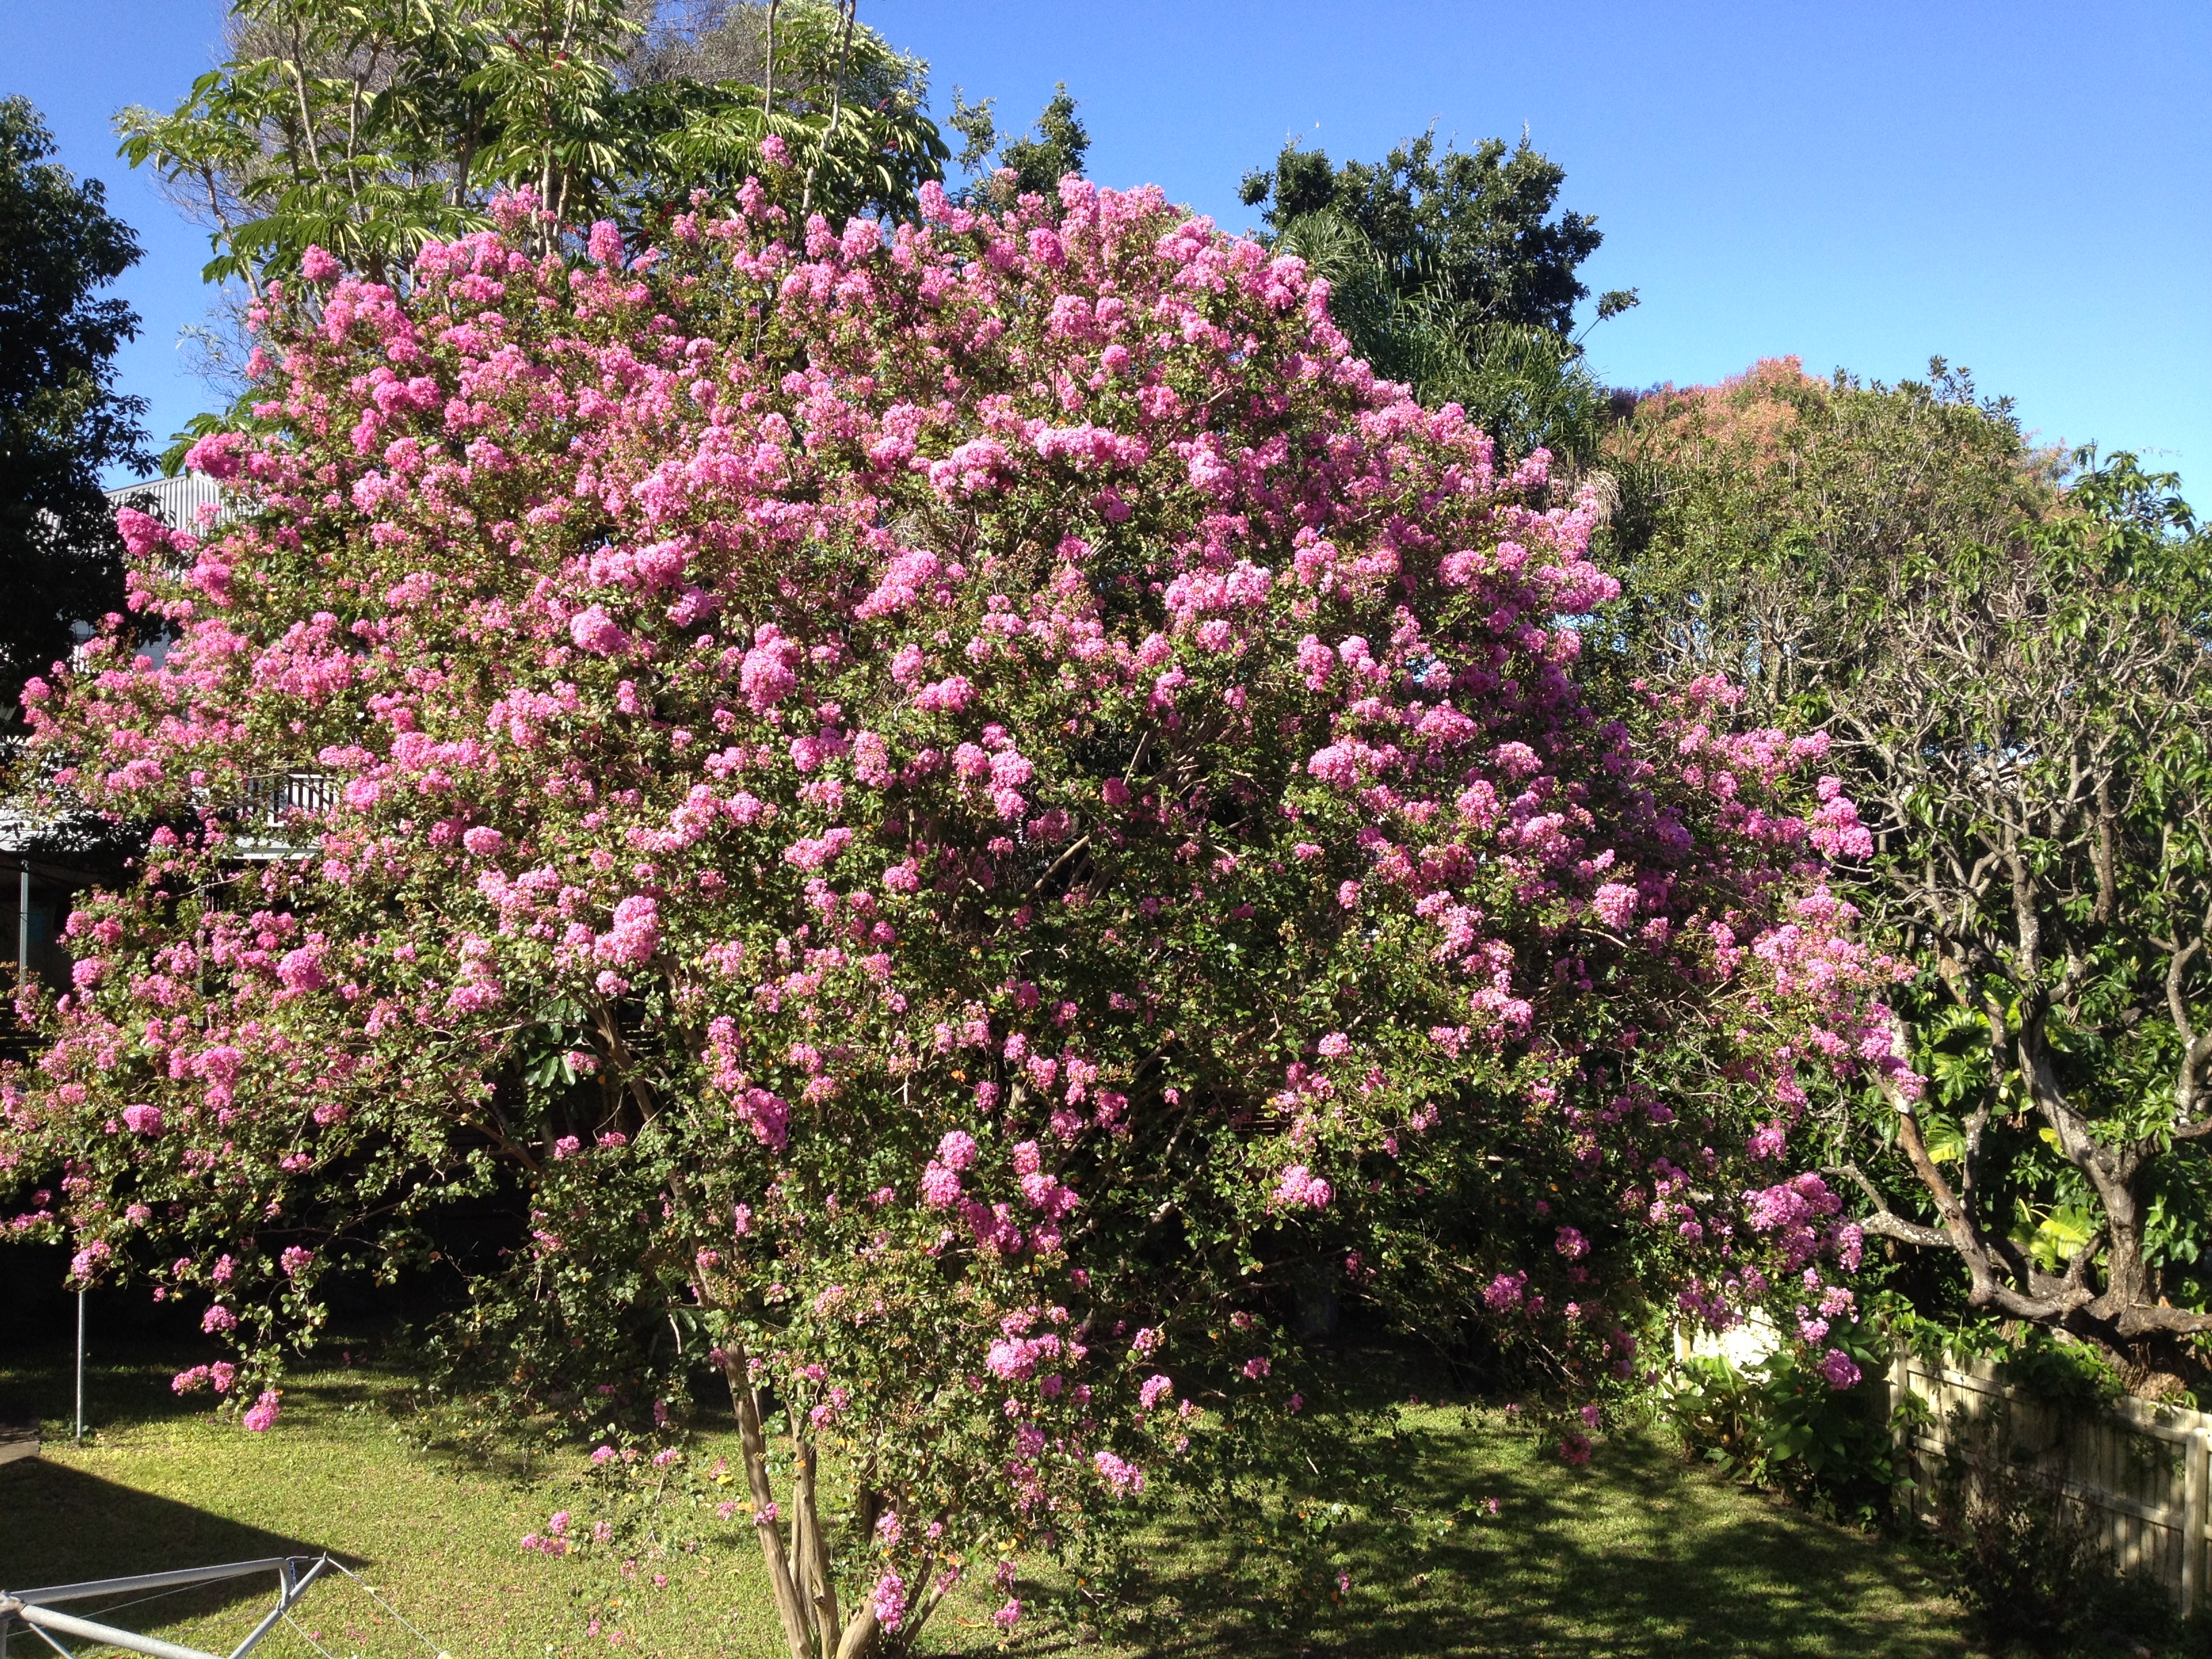
We started our fence adventure one day when we idly decided to remove the chain mail fence from the front yard. It immediately looked a lot better. But then we were left with some unsightly, ugly trees and bushes that were not doing all that well. We got the tree loppers in and they pulled out the lot, including one Ivory Curl tree that was really very pretty and doing a good job of protecting the eastern side of the verandah from radiant light from the ugly white Colorbond fence. I was not amused. And my neighbour on the other side, Christine, I think was secretly rather appalled that we had torn down all the lovely trees in the yard. Never mind that the trees were nearly all weeds or serious pests!

IMG_0101It’s a desolate wasteland where beautiful greenery used to be!

IMG_1663

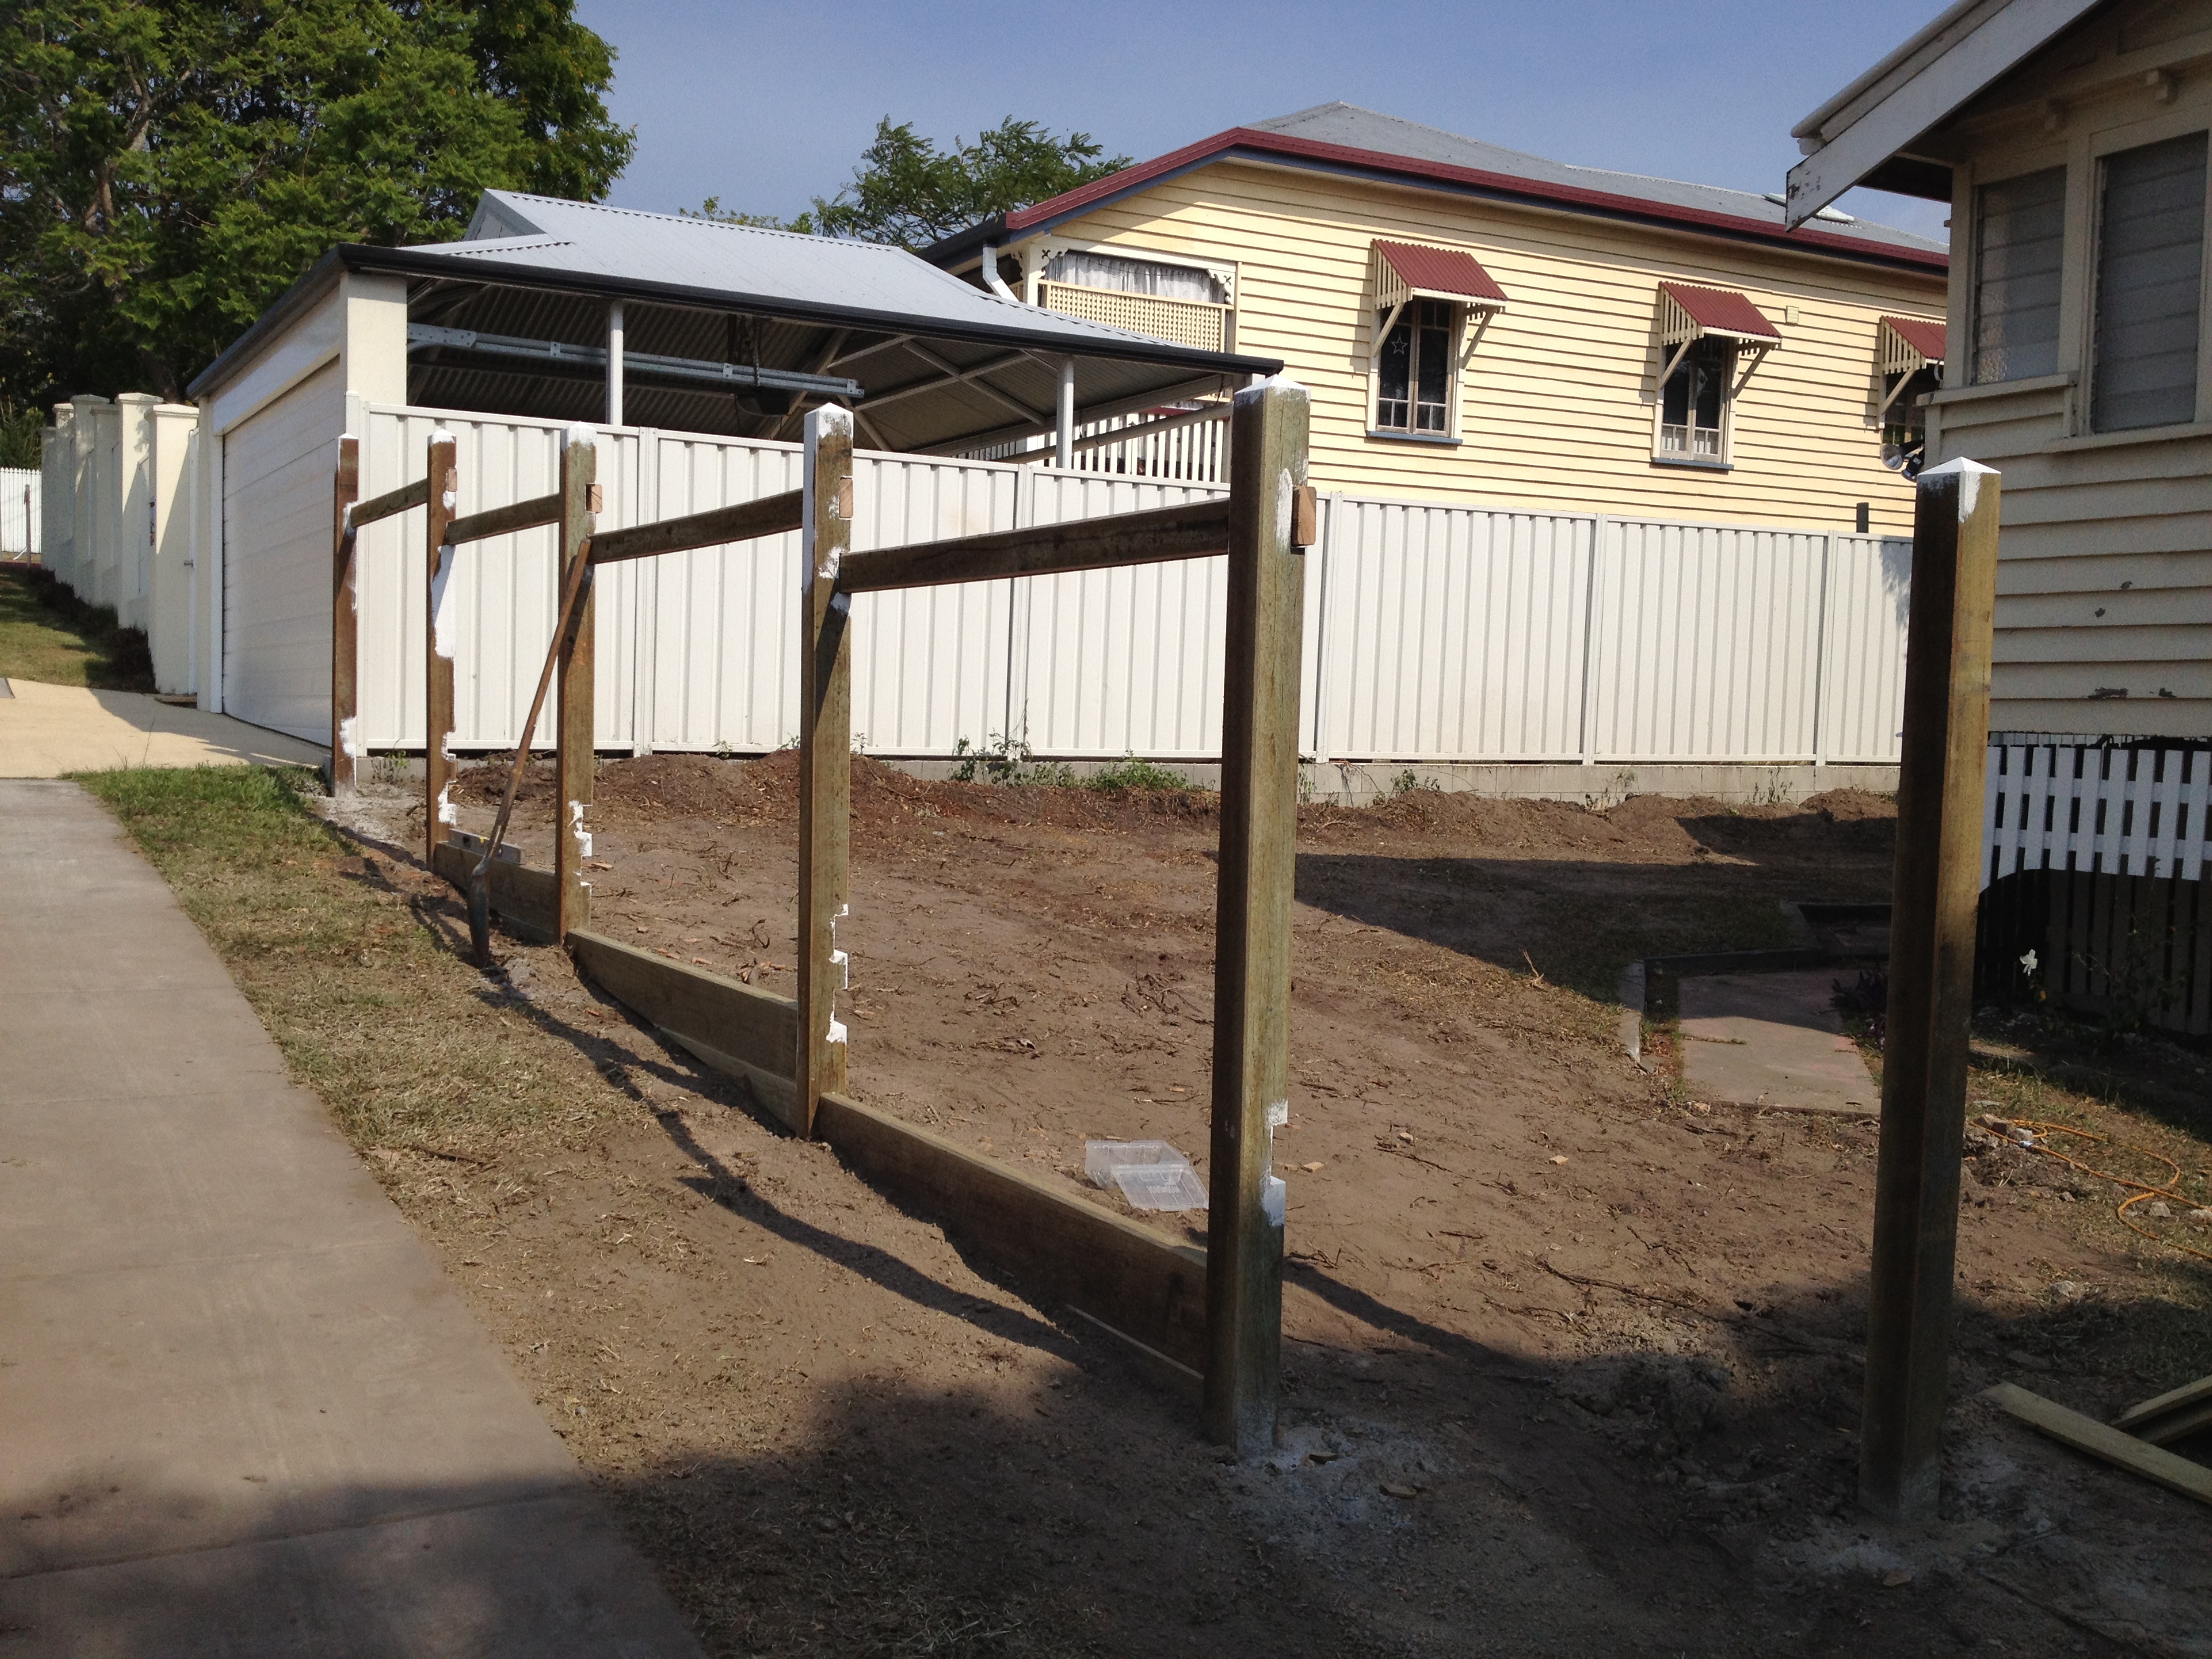
Then Chris began constructing the fences. We started with the side fence at the rear of the house. 20 metres of 6 foot high timber fence, and our neighbour was relatively happy with the result, tearing down all the ‘not quite working’ trellis from his yard and planning his back corner at last. It wasn’t too expensive, and we came to a good agreement about how the fence was to be constructed, and with what materials. Mind you, I had done my due diligence and we went for a cheap timber fence, and while our neighbour wasn’t too thrilled with the cost, I had done three quotes, and I was happy with the price. He was happy to pay the lowest of the three quotes: fine by me!

IMG_1577

Then Chris got onto the side fences. I asked for and got gates that would always close, but the silly tree loppers (who came back) then wedged the gate open so wide that the spring Chris had installed to the gates loosened off. Chris also repaired the other neighbour’s side fence as there was a rather dangerous lean to it – not surprising, as there is so much water flowing through the back yard that it just rots the wood. Oh well. Reminder to repair them again in 10 years time, but this time with steel posts, not timber.

IMG_1575IMG_1567IMG_1584

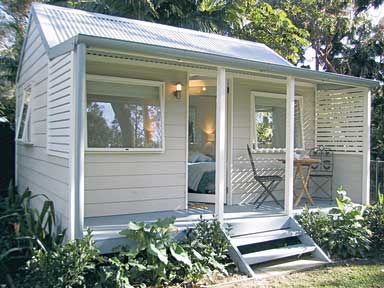
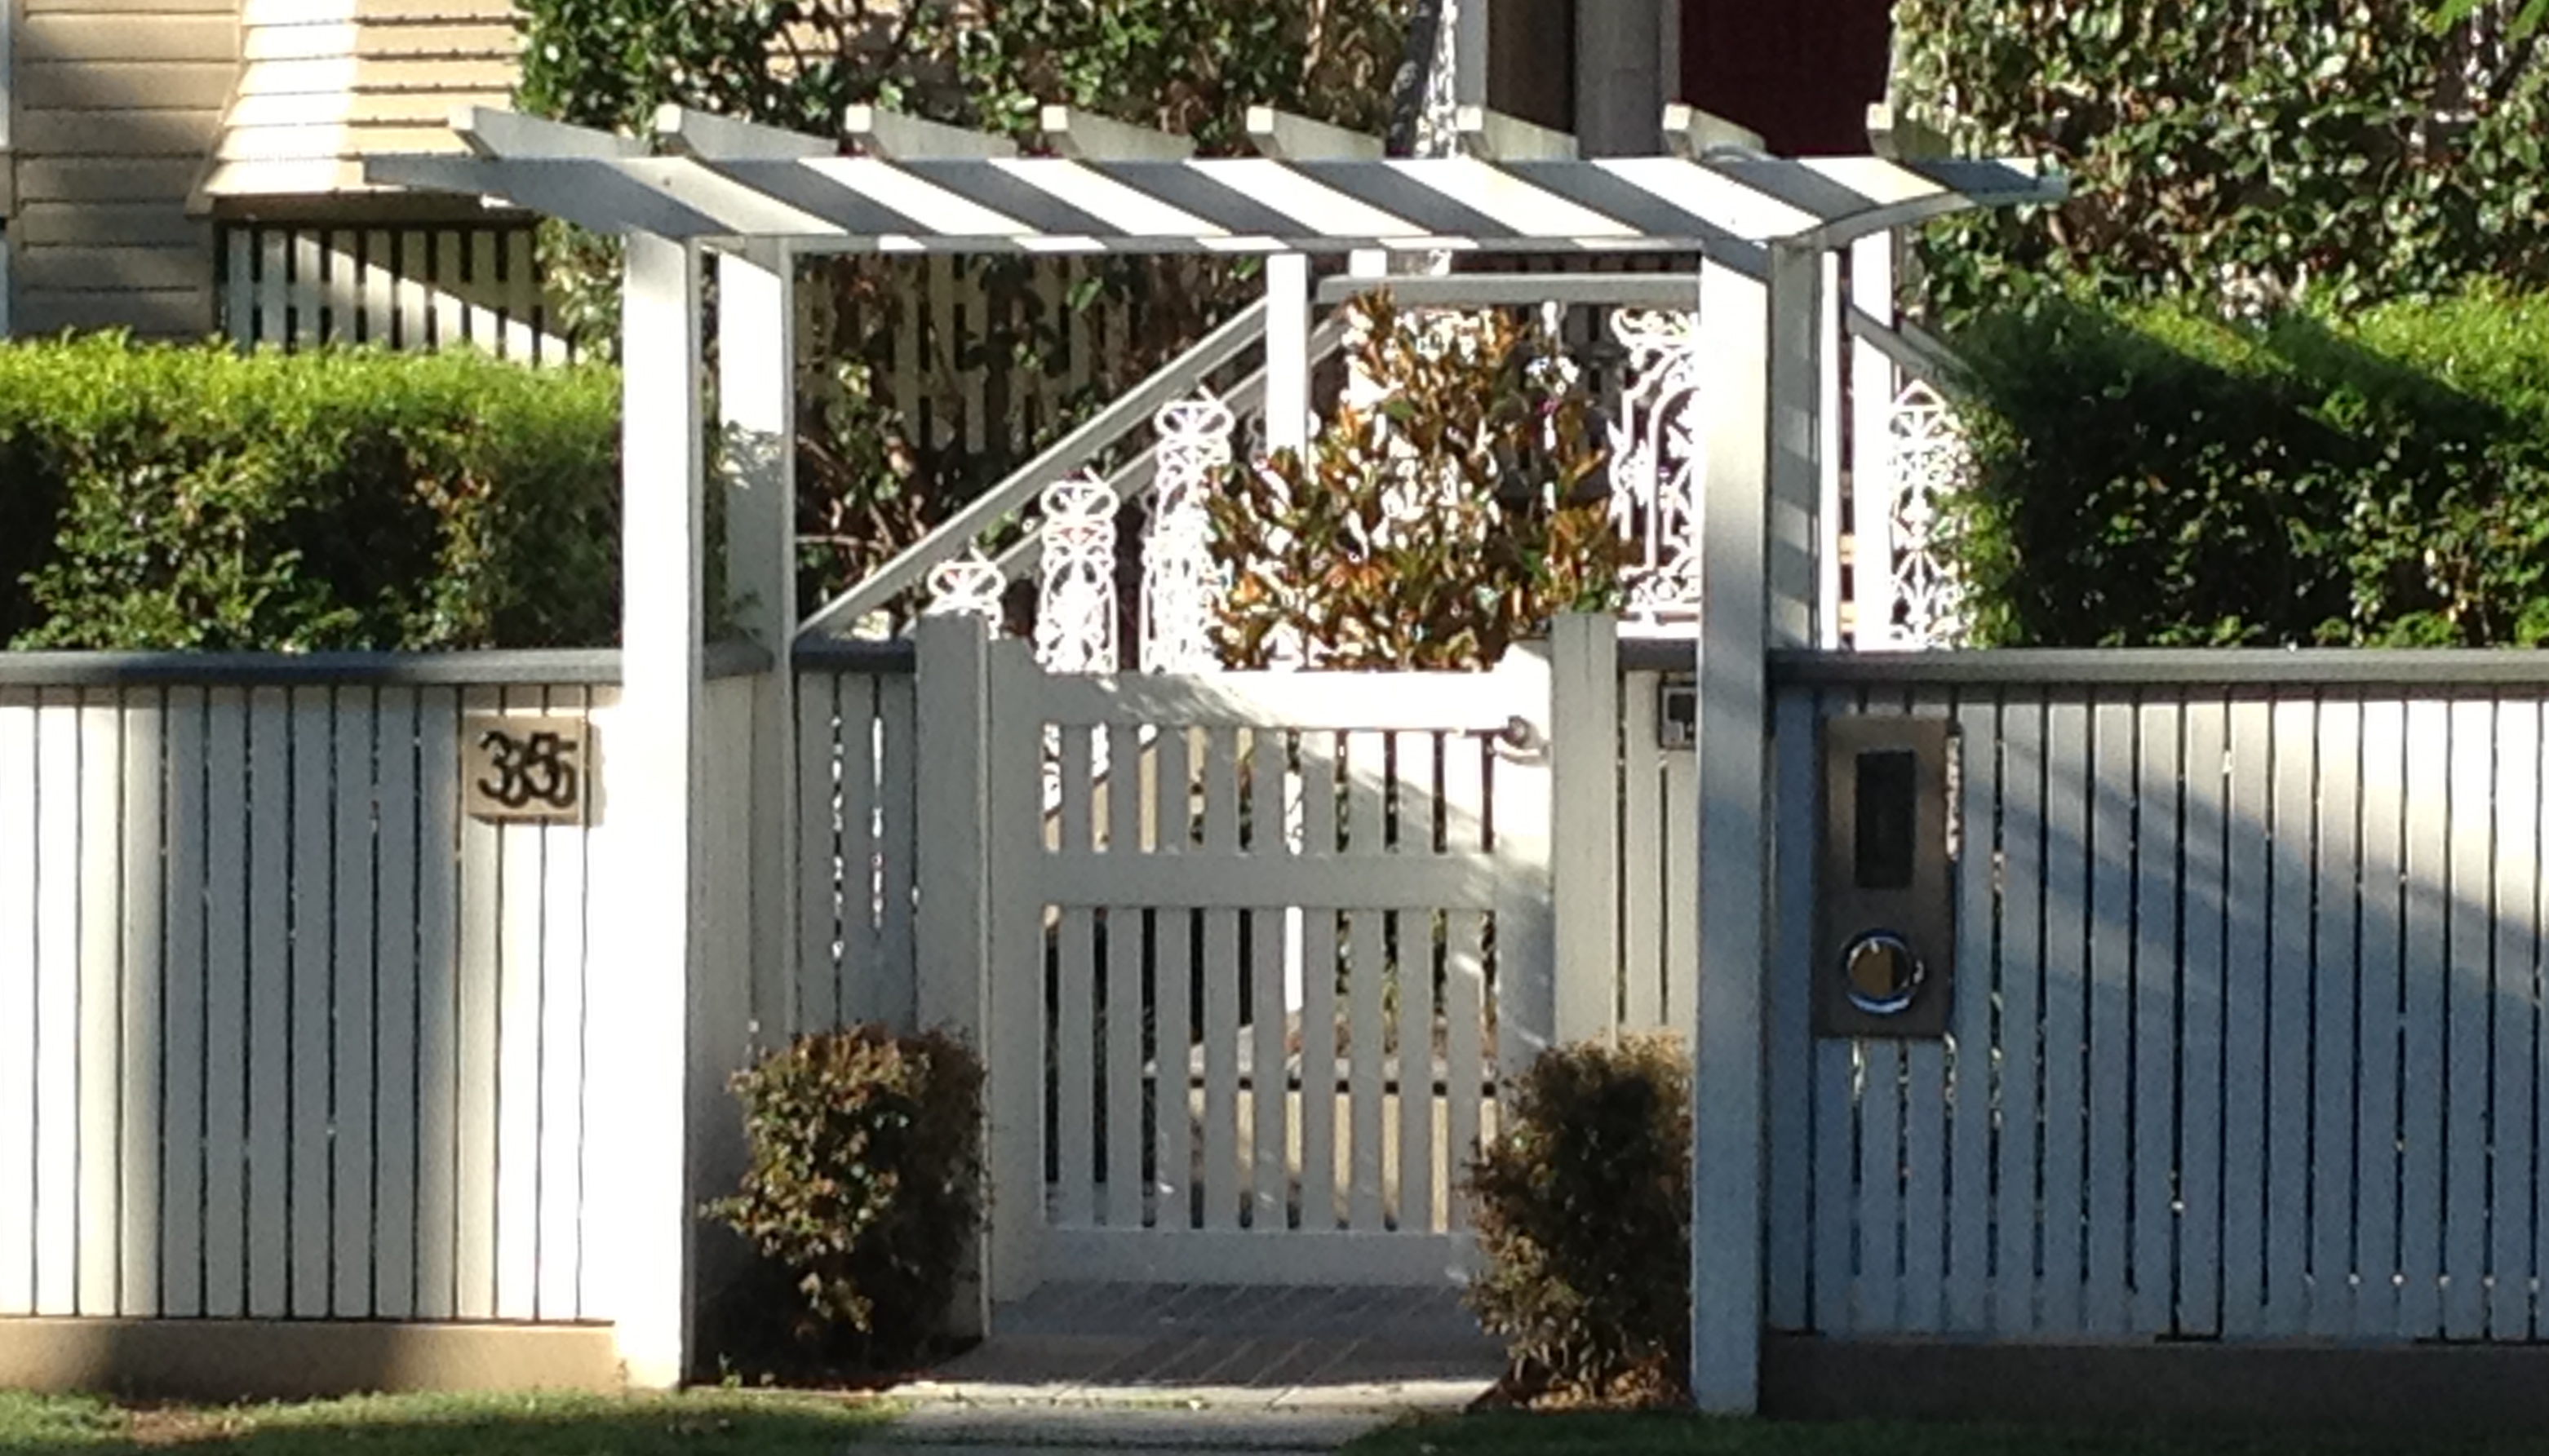
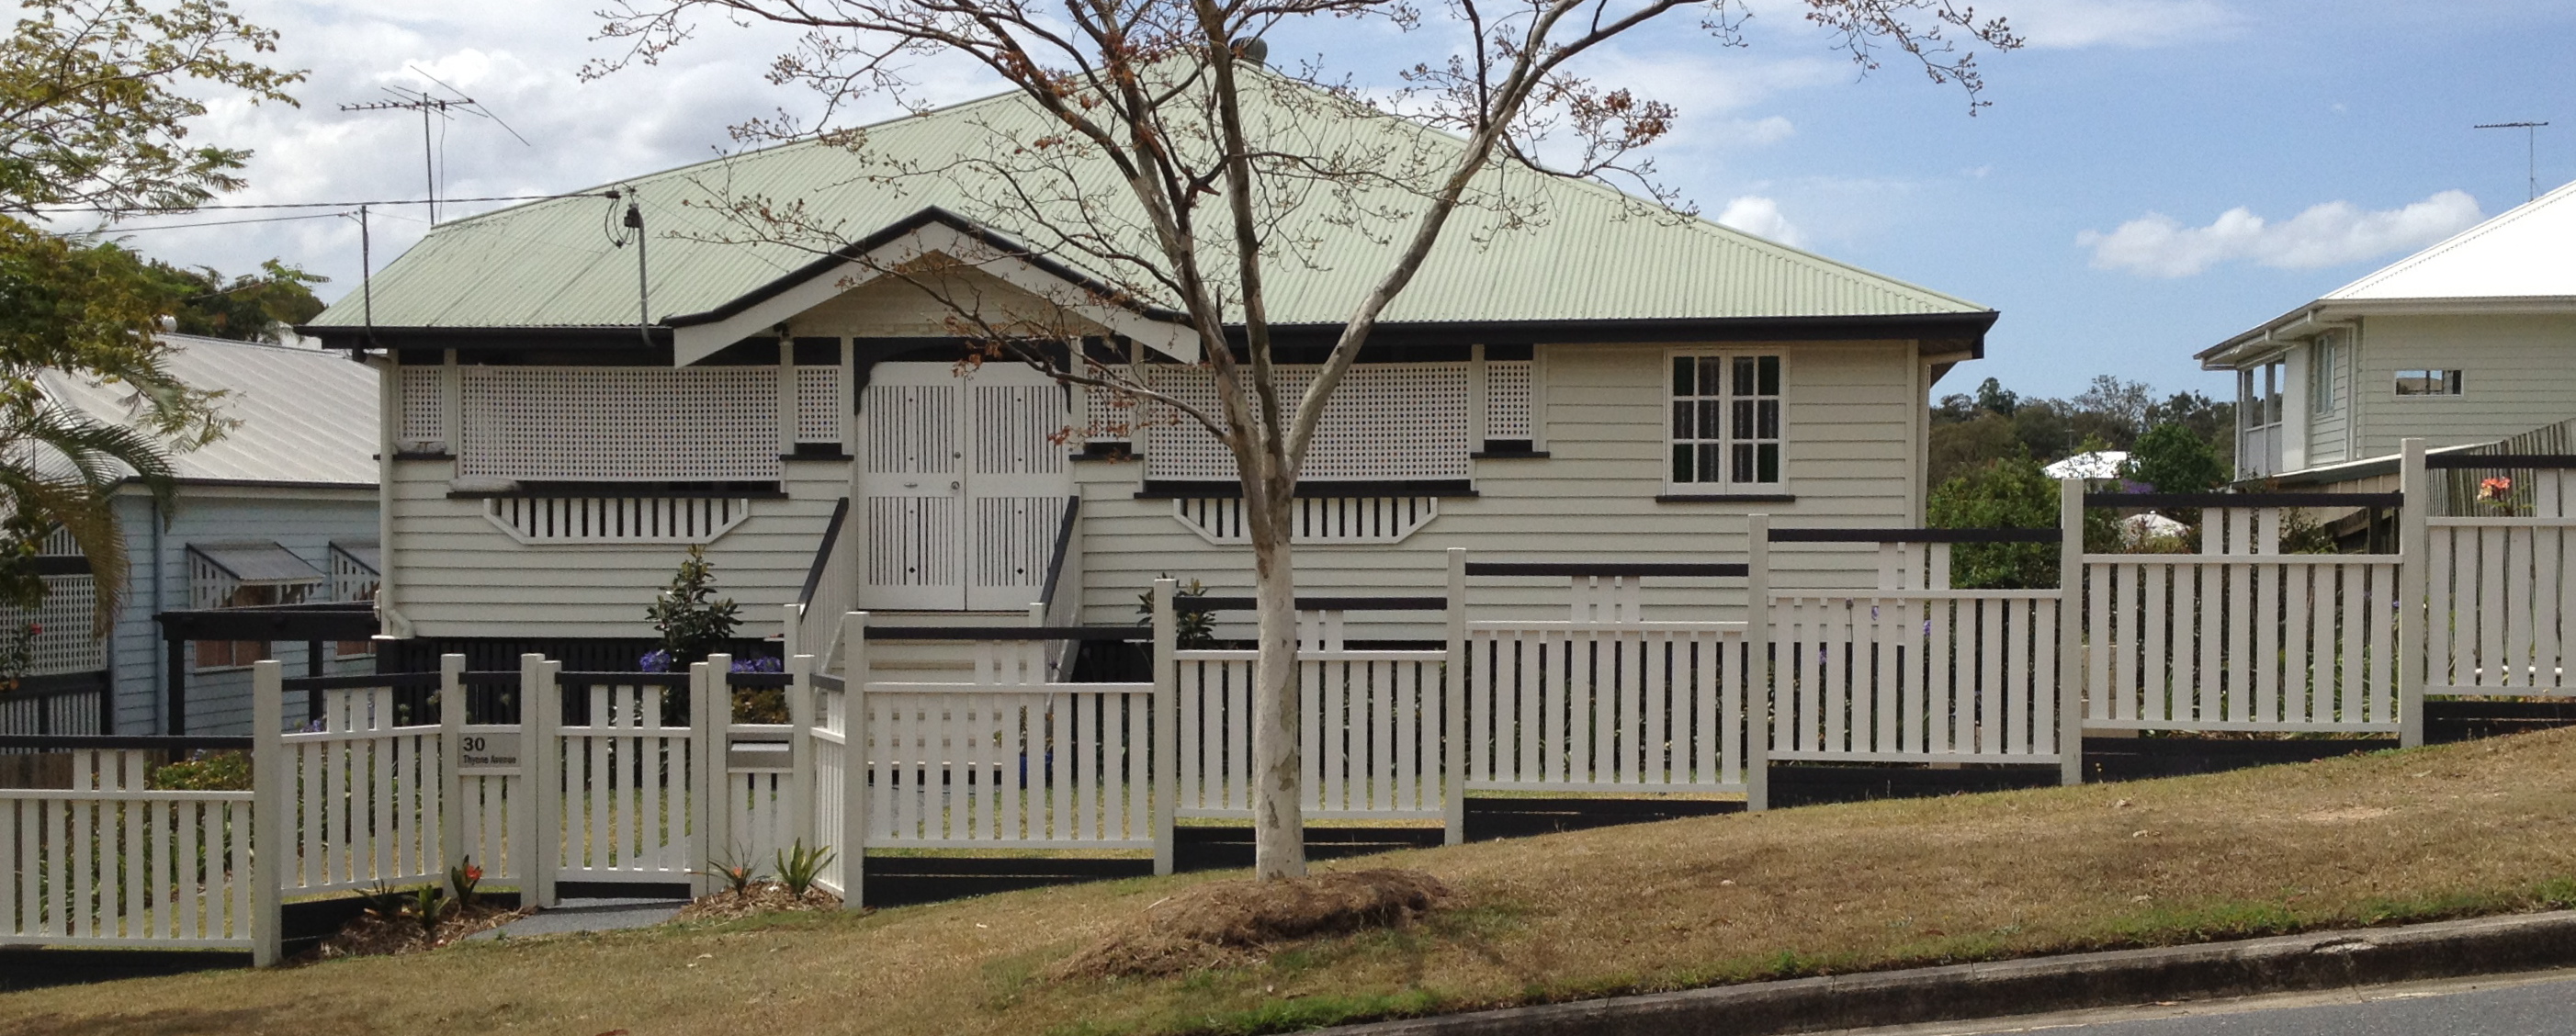
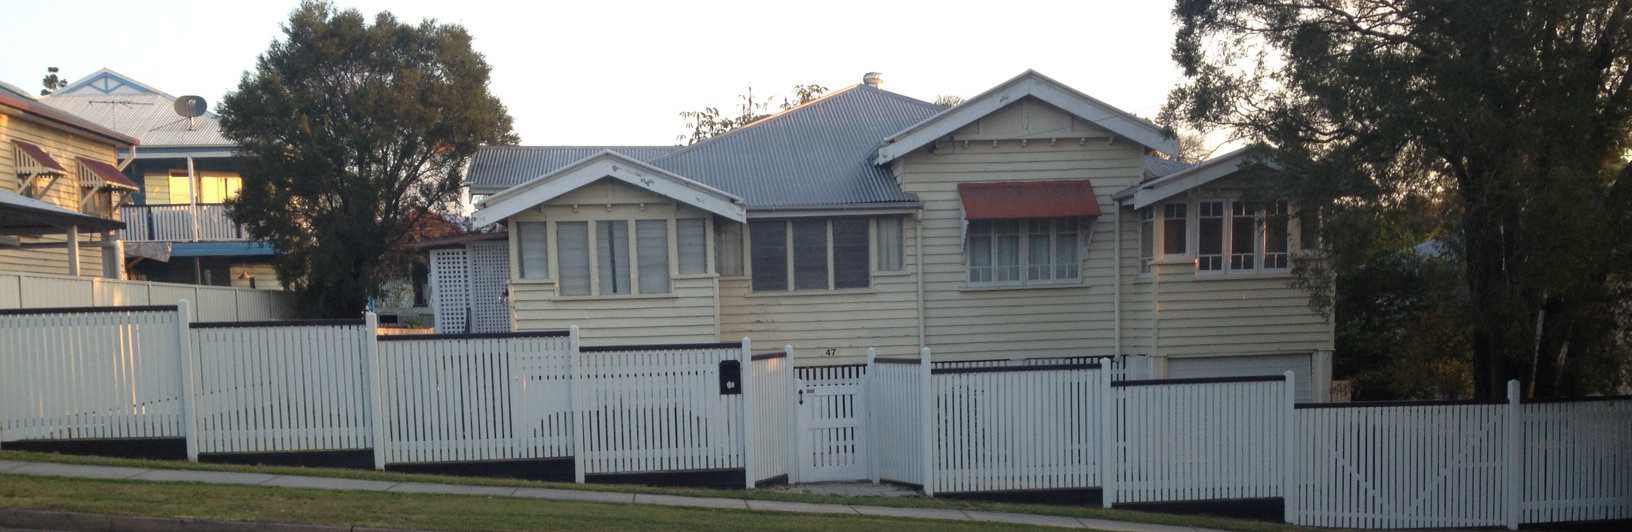
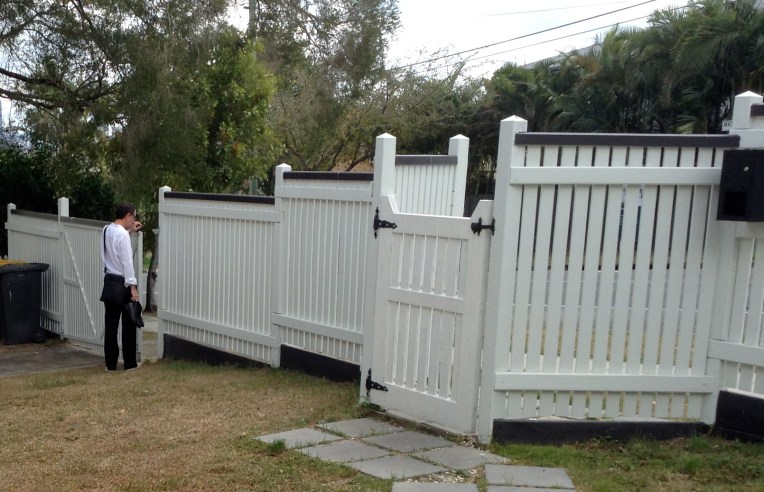
Finally, Chris constructed the front fence. We spent many happy hours driving around neighborhoods taking pictures of fences. Here are some that appealed. Our house is on a busy road and I wanted airy privacy for the front yard, yet a look that ensured a welcoming entry for visitors. Being a 1920s construction, our house needed something that had a similar but simple style, in keeping with the house’s simple bones. These are the fences I looked to for inspiration.

IMG_1435IMG_1449IMG_1473IMG_1480IMG_1550IMG_1440

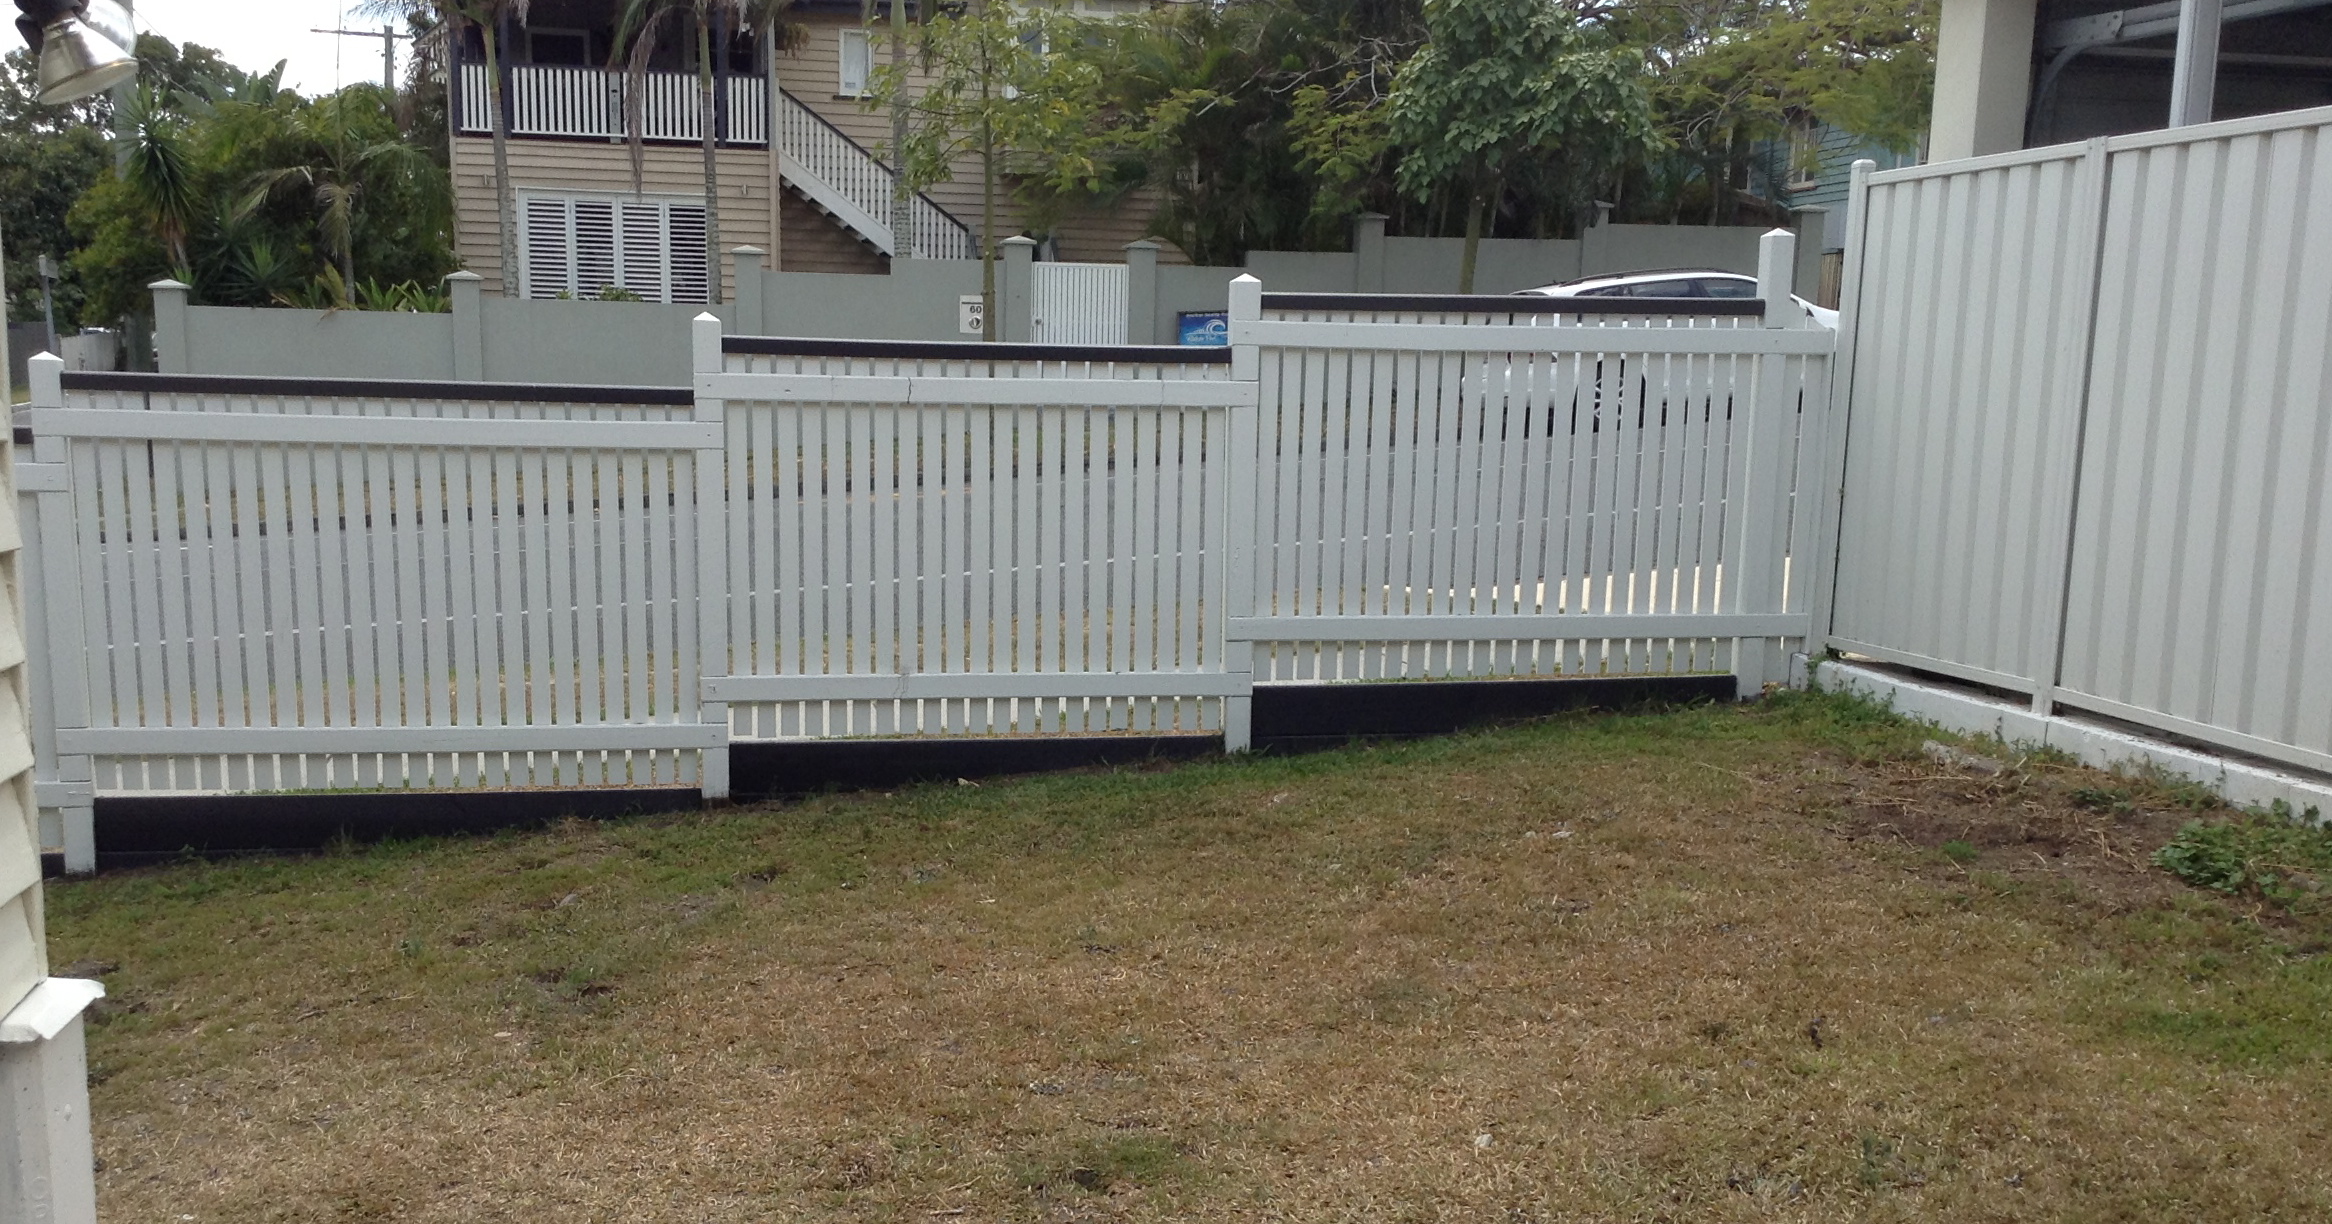
This last fence was extremely beautiful and we coveted it mightily, but when our builder popped round to have a chat to the owner about the cost, it was more than double our budget. Chris came up with a great solution. We decided to have a tiered fence, with sleepers at the bottom because it looks so sharp and neat. We finished off the sections with a simple bread loaf rail and posts that Chris honed to a simple point. Because of the 6 foot height of our fence we needed two rails, hence our preferred fence (see above) wasn’t doable for us as there are no rails behind the palings and the height of the fence is only about 1 metre.

IMG_1674IMG_1698

We created a slight angled inset at the gate to provide a more welcoming entry point, given that our street is busy and tall, straight fences can look awfully forbidding:

IMG_1697

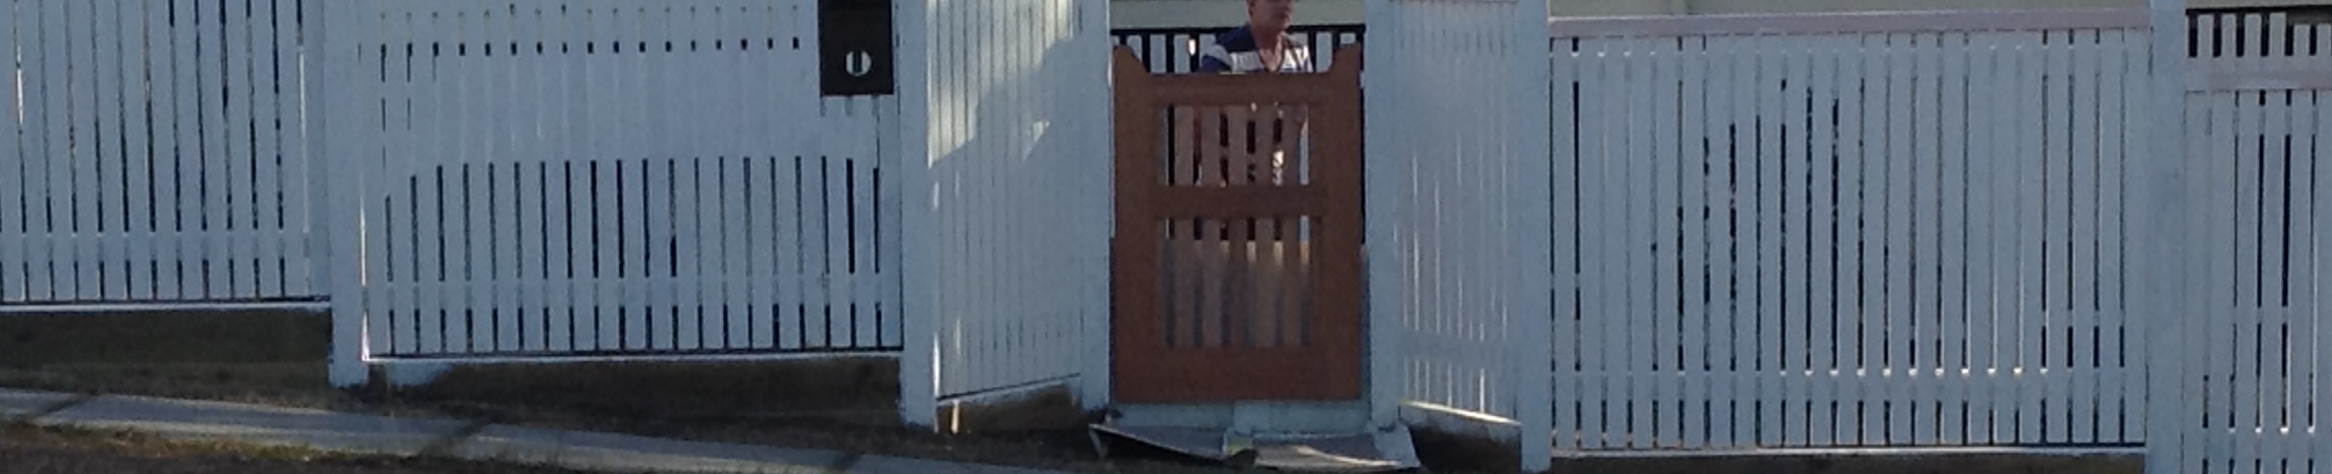
We had some difficulty over the gate. Originally we ordered a gate from Woodworkers in Moorooka that was wider than this opening, but that was before we cleared up a minor misunderstanding about the inset sections. And we couldn’t decide whether to have a higher or lower gate. We chose the latter, mainly to increase that welcoming feeling I was talking about:

IMG_0193

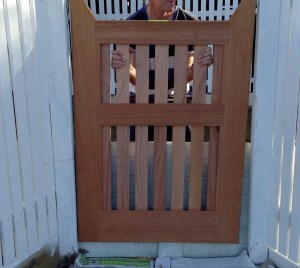
From a distance it initially looked too low and a little narrow, and we were very disappointed:

IMG_0199

But over time and with a lick of undercoat the gate has blended into the fence line. We had two gates: one was for the garage section. Chris constructed a steel frame and attached a spring wheel to the base, to give it purchase when open:

IMG_0142

In a few years when we replace the garage door, we’ll make this gate automatic. Not right now, though, because that would mean rewiring the whole house. And goodness knows how much THAT will cost!

Finally, we had to choose the letterbox. We looked at various option including this ornate one:

IMG_1438But we finally chose this simple, stylish black mail box, from a locally owned store literally down the road:

IMG_1439

The first topcoat of the front fence is finished and it already looks a treat, but silly me thought that painting faux oil paint just before the dew point at dusk was a good idea, and the bloody paint dripped. It’s only the first top coat, though. Phew. I can sand and do another coat. We applied 2 coats of Dulux all-in-one oil primer/undercoat, then for the top coat we used Haymes paints in Dulux colours. We have to get more paint, but there’s LOTS more to do before the second top coat goes on.

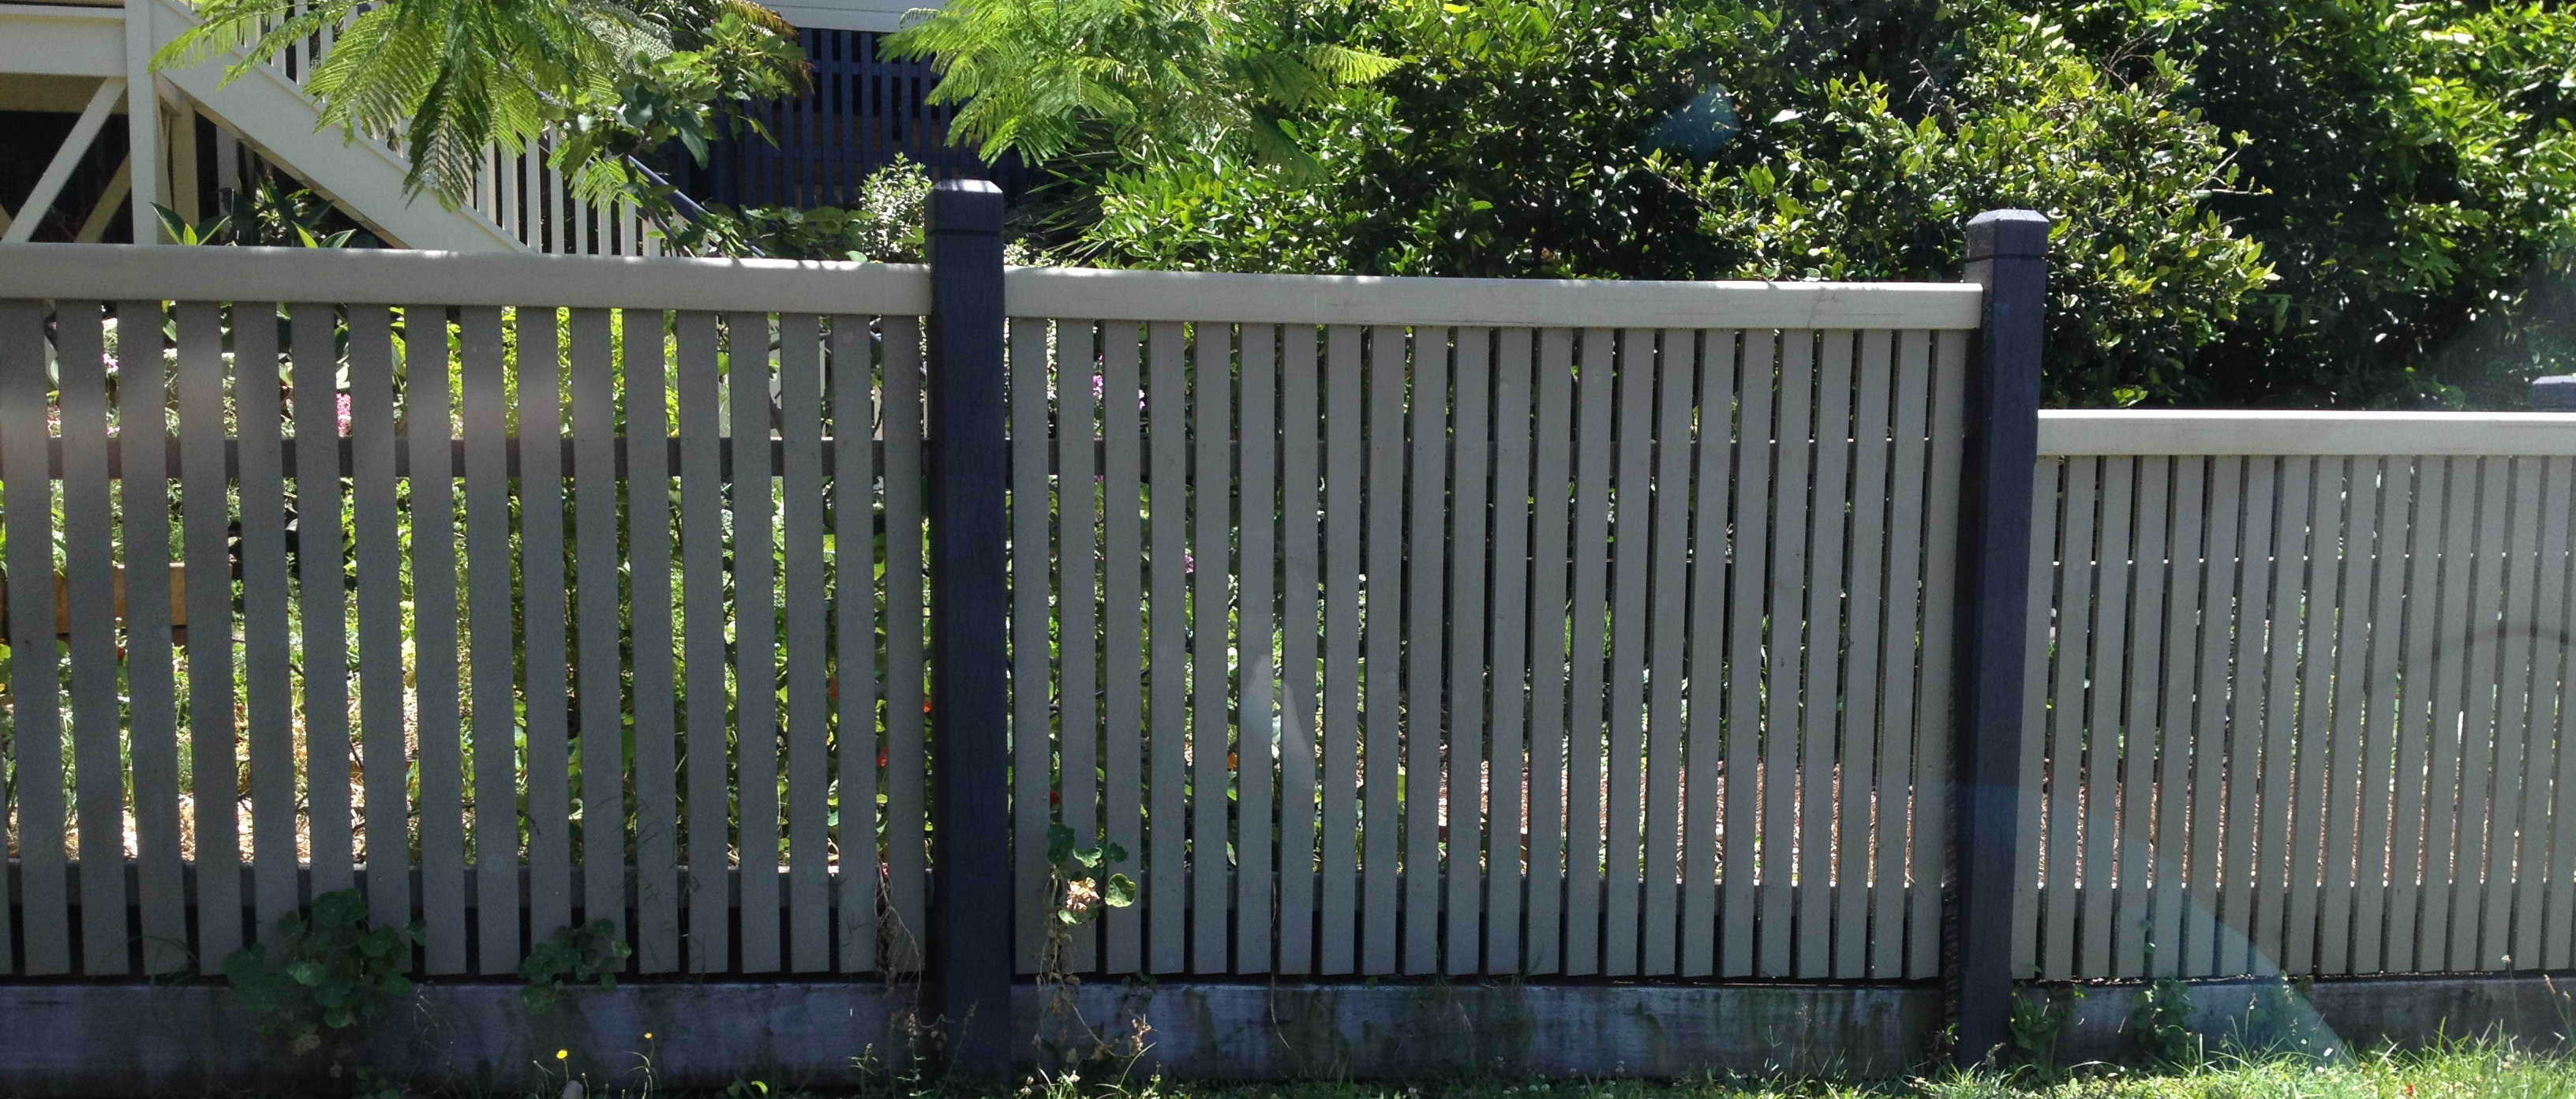
And as I said to hubby just recently, the lovely lovely new fence looks like fresh bunting on a tired old used car saleyard, but once we paint the house exterior it will look wonderful! For the palings we chose the shade Surf Mist by Colorbond on the advice of our builder Chris, as our gutters are that colour, as is the Colorbond fence at the left. Surf Mist isn’t completely white, but is still bright and clean and hides road dust well. For the top rail and bottom sleepers we chose Wayward Grey by Dulux, because it’s sometimes black, sometimes grey, sometimes a little bit brown or purple or even burgundy. A great colour. We’ve not yet decided on the post colours, but we want a fawn/grey colour to give a bit more sophistication to the fence. In the meantime, though, they’ve been painted Surf Mist too.

I’m super happy with how the fence turned out, and very happy with our builder, Chris Biancotti.

I guess this means the house palings will be Surf Mist and the house trim Wayward Grey. Not sure about the windows at the moment though.

IMG_0394

IMG_0411IMG_0410

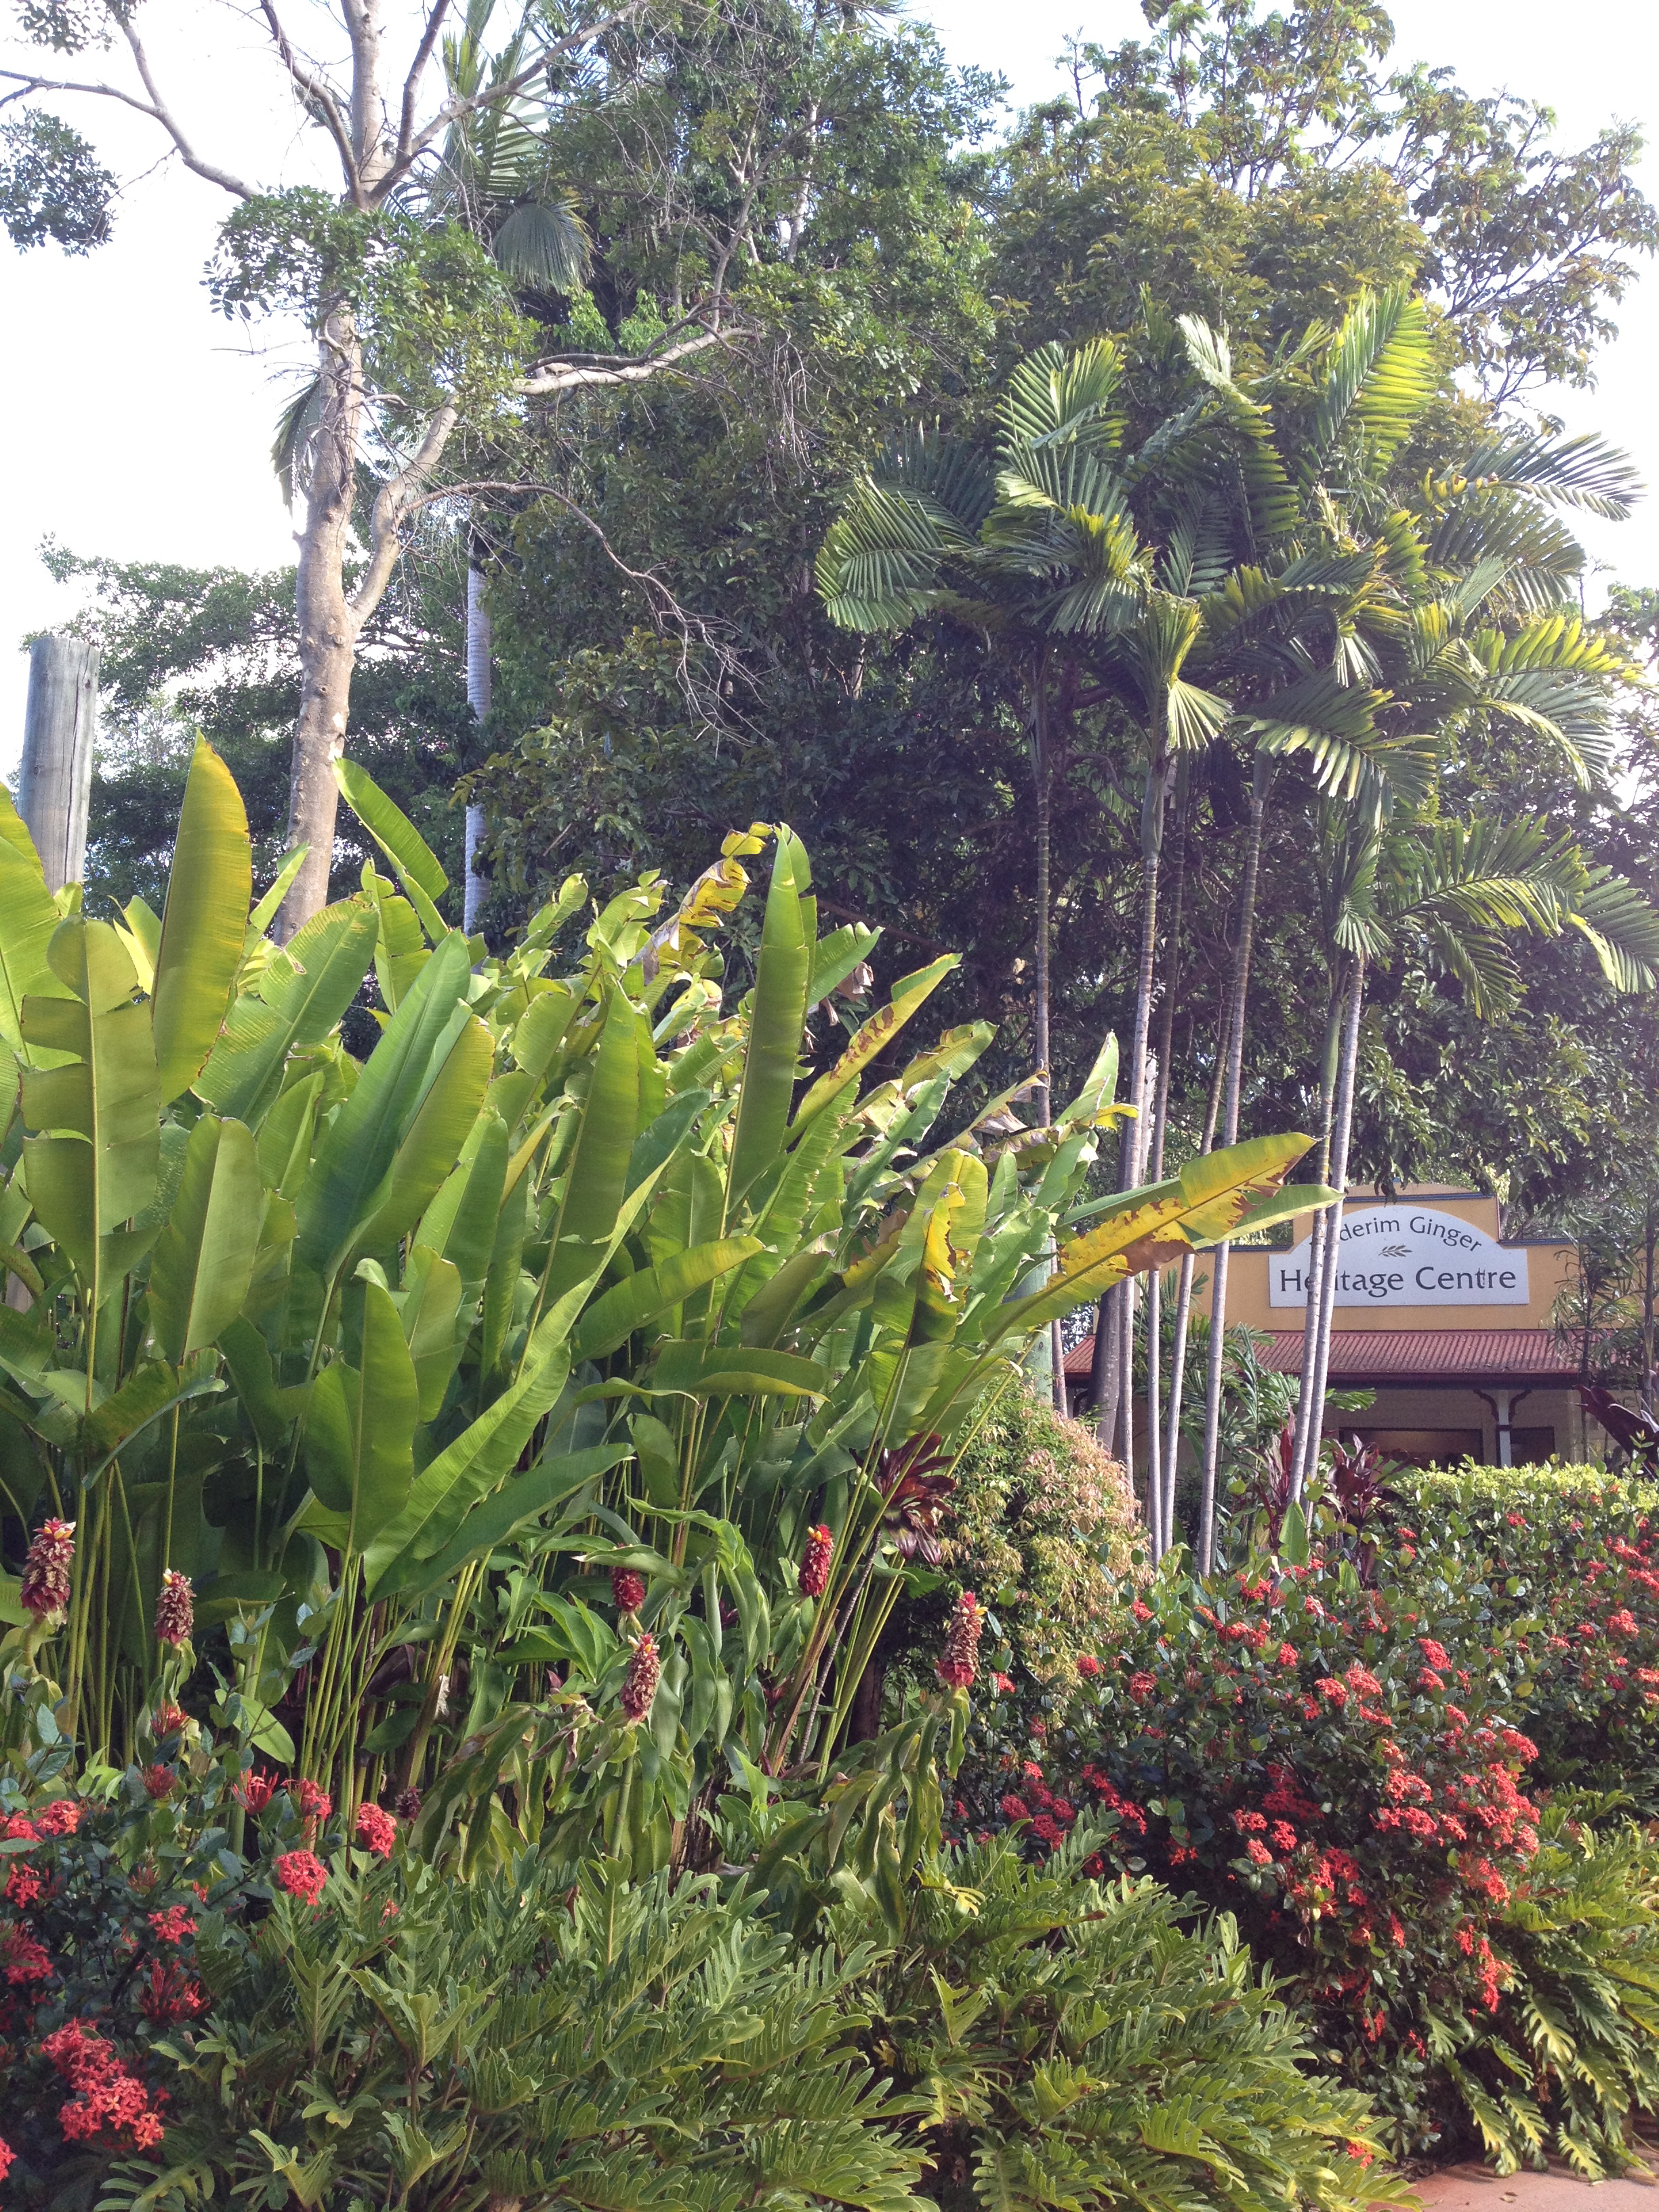
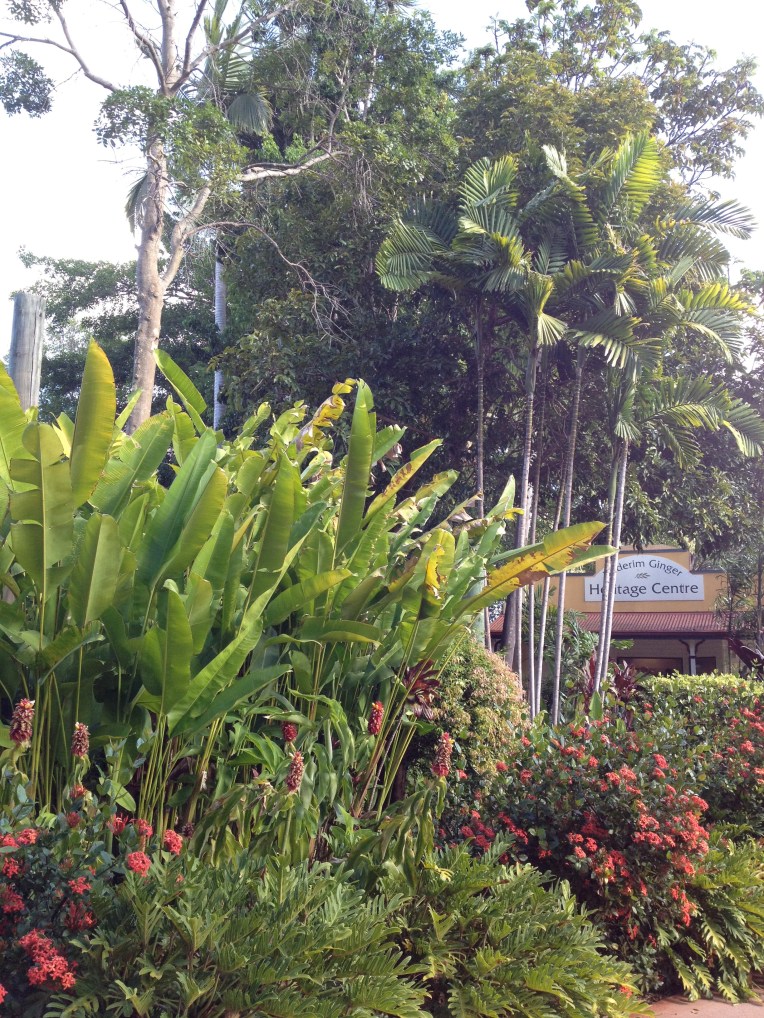
Once the second coat has been finished, we can plan and commence our front yard planting. I’m thinking a white or pink Frangipani should go in this corner, and the whole front to be lined either with golden cane palms, Giant Strelitzia or mock orange hedging bushes to provide a sound and sight barrier to the street. Then we’ll plan the remaining garden bed with some ginger and bromeliads, a little bit like this garden bed we saw at Buderim Ginger factory but without the monstera plants, which grow out of control in home gardens:

IMG_1748

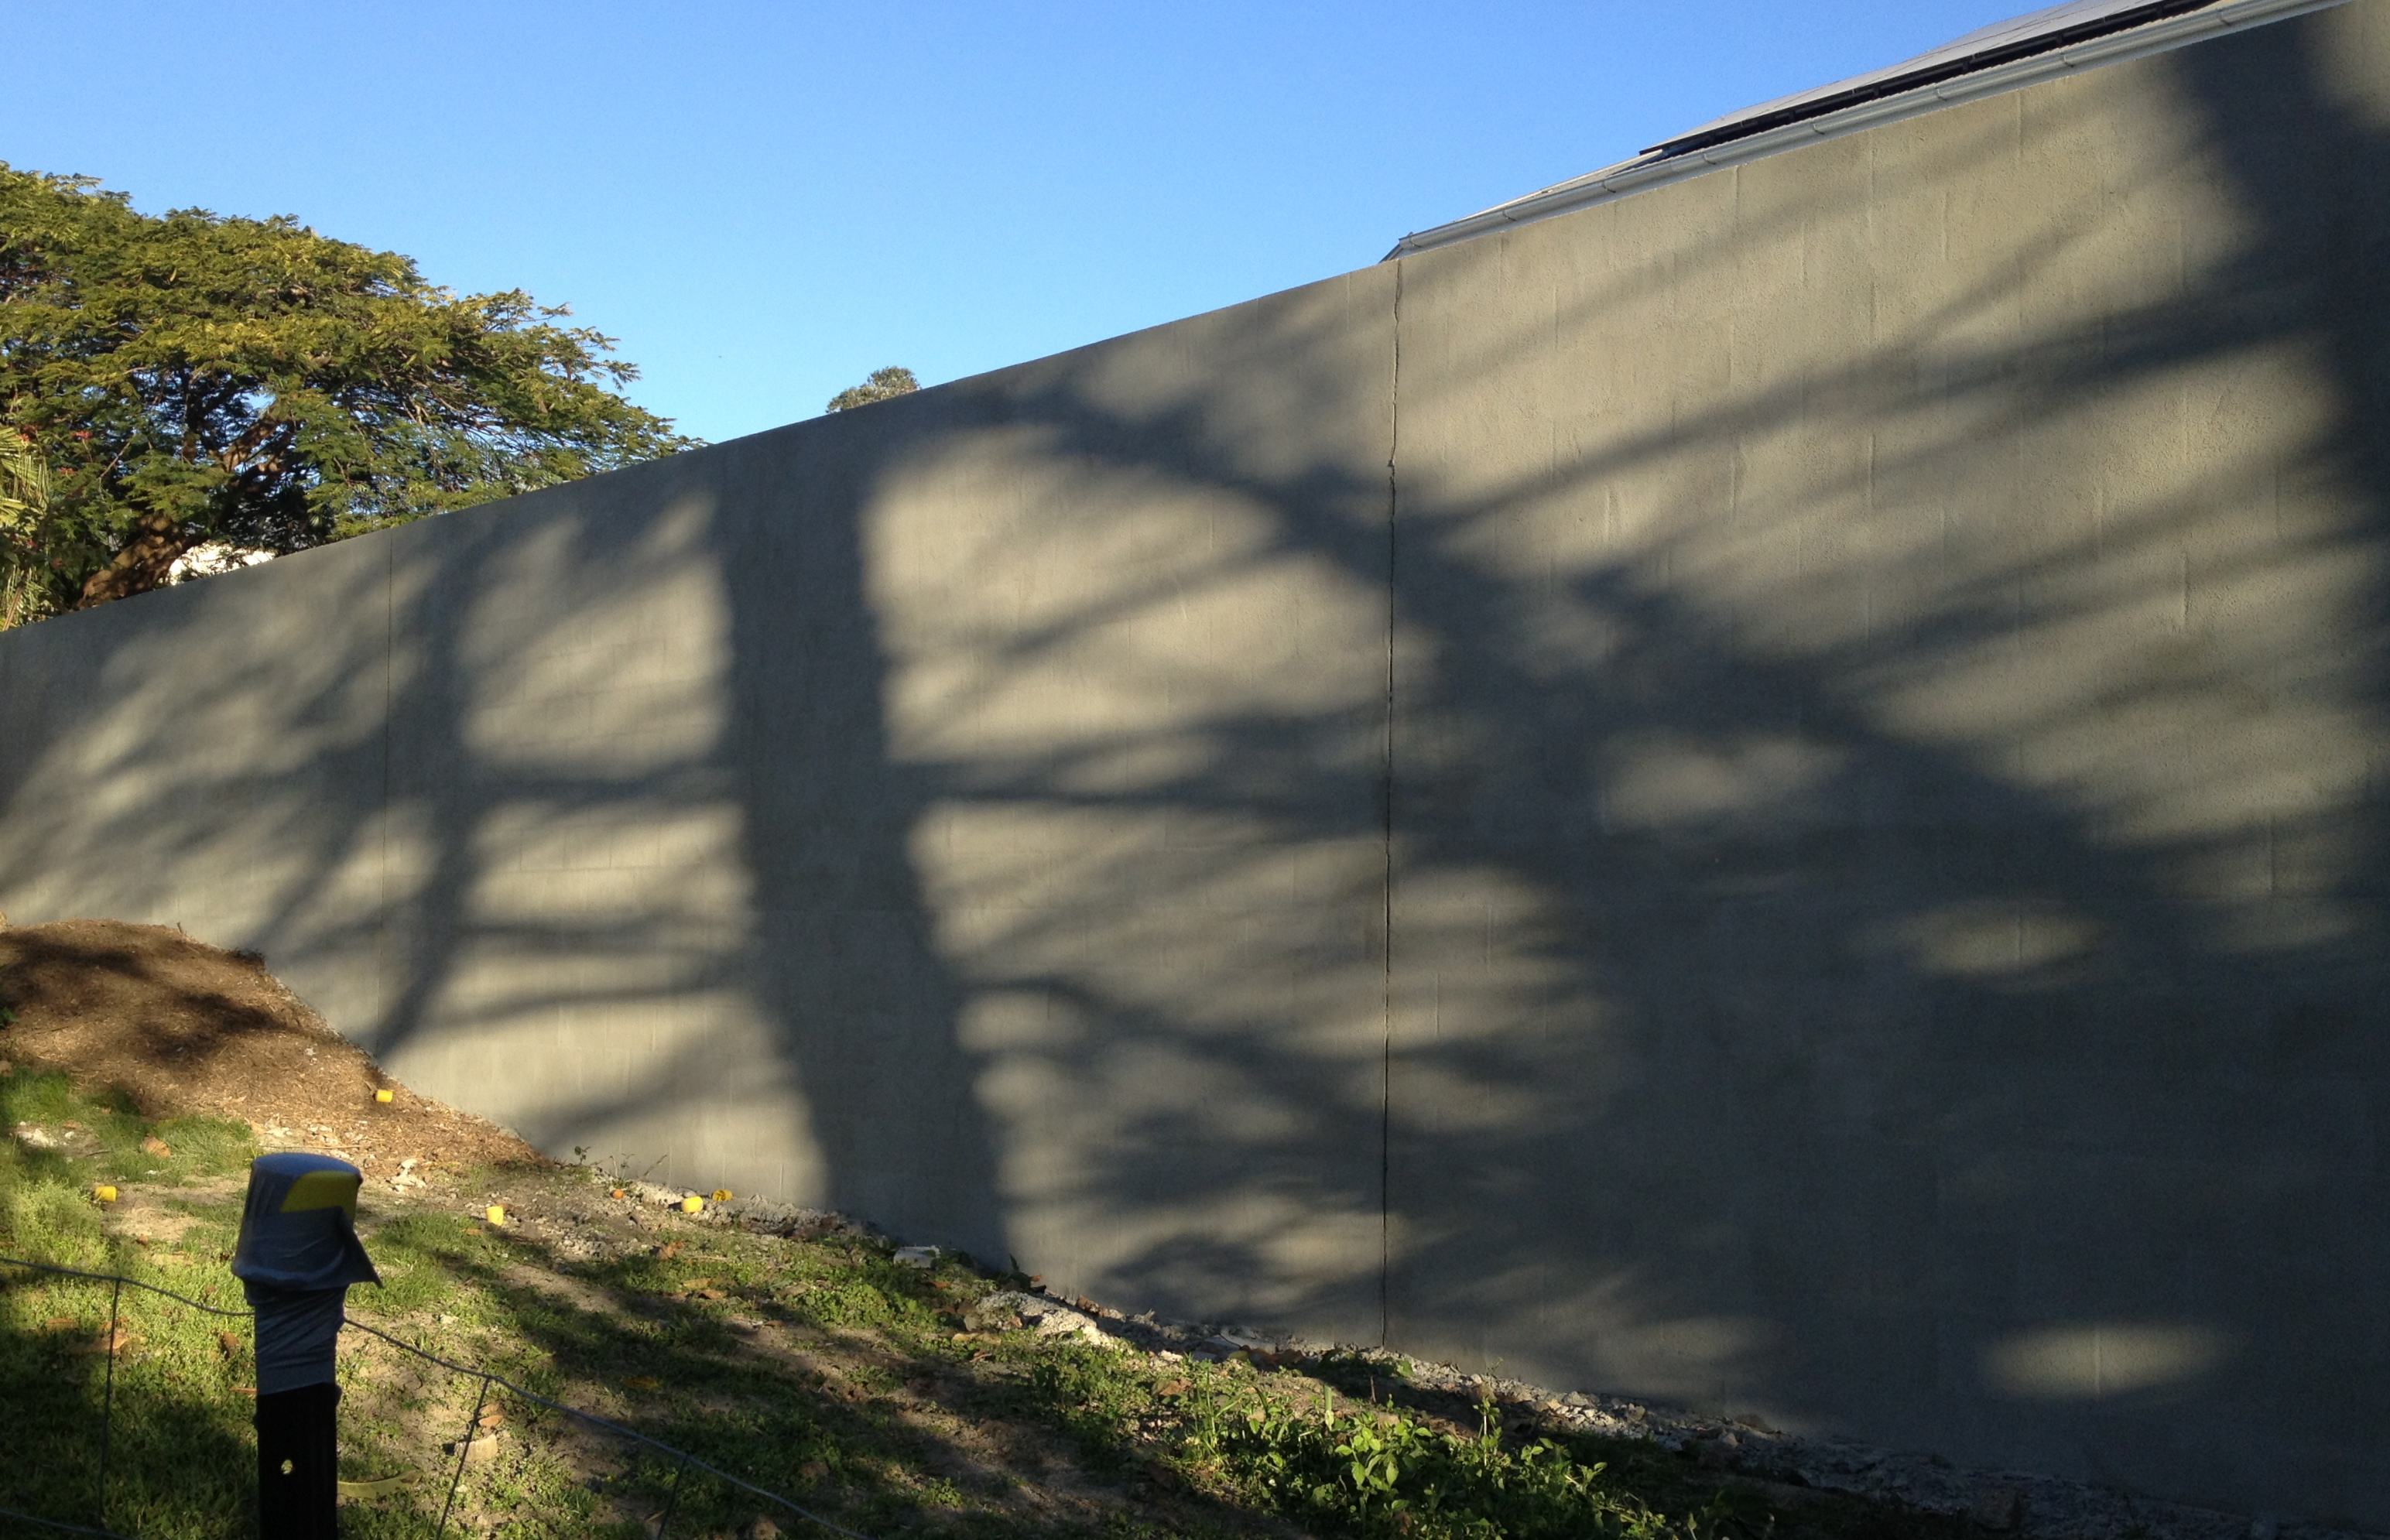
But wait, I nearly forgot to show you the back fence! Our lovely neighbour, who I will call Sheila, has been renovating her house. She informed us she was taking down the lovely but dilapidated timber fence at the rear and building a retaining wall out of bessa brick (cinder blocks), against which her pool would sit. Well. I didn’t mind, but when I saw the height of the fence, I gulped:

IMG_2162

It’s about 1.8 metres high at one end, and at least 3.5 metres high at the other. I felt rather hemmed in at first, but Sheila kindly had the wall rendered and in a few months we’ll paint it a deep purply/black colour prior to planting out with tropical hedging plants such as Golden Cane and other palms. She also asked if she could remove the last remaining (ugly and stupid) tree – a pinus radiata – from our back fence line, because its needles would fall in her pool. No wokkas, quoth I, please, take the thing. She removed it.

Now our yard looks like this:

IMG_0407

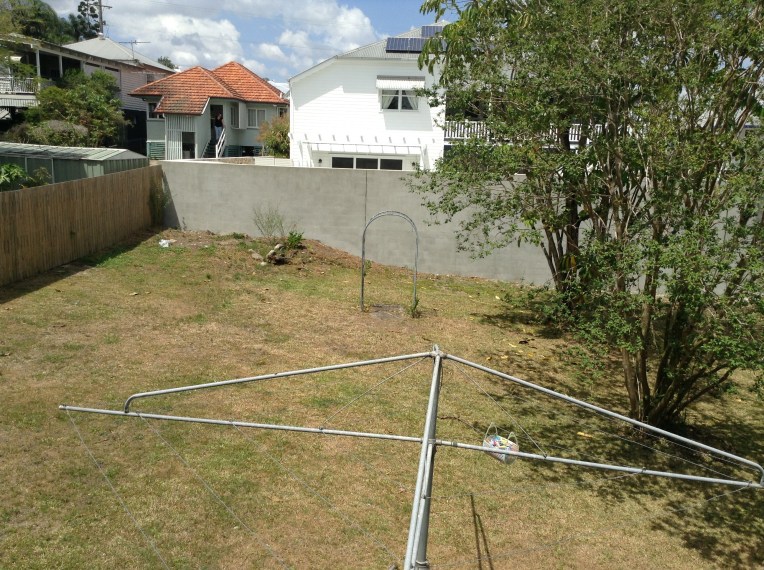
It’s desolate and sad, and nothing like how it used to look:

IMG_0852

We still have problems with Chinese Elm popping up everywhere, but eventually it will give up and go away as long as we keep poisoning it!. Then, after all the renovations have been completed we will plan our lovely, tropical-style easy-care garden.

Kitchen caboodling

Hello, I’m back! I took time off this blog to do some work in the real world and now I’m on holiday (read: unemployed while I finish my PhD) this is a chance to blog about the next thing that happened after the floors went in.

So, I’d said that the only things I really wanted were a kitchen in good working order and polished floorboards. The floorboards have worked out much better than the kitchen, but we were doing it on the cheap, so we went for industrial country. Via Ikea. Our mad Irishman removed what was left of the old kitchen cabinets and they have been momentarily re-purposed as storage for linen. Then DH and I went shopping. At Ikea and Bunnings. This is what the old kitchen looked like pre purchase:

kitchen pre pre renovation

Quirky retro kitsch. However, we didn’t get to see it like this: by the time we bought the house, it looked like this:

kitchen

Beautiful, hey. This is pretty much the sum total of our kitchen prior to fixing it up. Some of the drawers made it into the house as linen storage and the old table is currently being used as a worktable downstairs. The yellow above-head shelves went to friends. Well, anyway, clearly one measly wall of yellow cupboards wasn’t going to cut it. So we traipsed off to Ikea and this is what our kitchen looks like now:

IMG_2397

Weirdly, not that different from the old picture, given the constraints of furniture placement and doors. There’s not much storage space and even less bench space, but it works pretty well for now. We kept the old working stove, which sits on top of a rickety old masonite cupboard, although 1 month after we moved in 2 of the stove elements died, so we’ve been cooking off 2 elements and the oven. I’d like more. And preferably a stove that doesn’t have a rear incline, as all my eggs currently end up on the far side of the pan.

The whole kitchen including labour and plumbing cost around $3000. I estapoled the timber benches myself because I don’t trust Ikea stuff anymore, which was a very good idea in hindsight. Now that I own an orbital sander I can easily give them a brush up, too. So all the benches and bench tops and handles and stuff are Ikea. The 2 types of shelves are Ikea. On the right is an old 30s kitchen dresser I bought on Ebay for $150. It’s not fully original because the original lead-lighting is missing, but that’s fine, because it was cheap. One day I’ll sand it back again and paint it. Probably white, but I’m digging red right now, so maybe it’s best not to paint it at all. I might do something unspeakable. My sister had given me 2 fun posters year ago which served as impetus for the room colours and about 6 months ago we bought the beautiful new red coffee machine. A monster, but then, I have monster coffees. So, red is the theme for our kitchen, with small white bevelled subway tiles sourced from Paddington Bathroom supplies and installed by the good people at Tile Pro.

From Bunnings we bought the super cheap but serviceable sink, and we bought the tap on sale at Trade Link,  a plumbing supply store in Coorparoo. Problem is, the tap keeps coming adrift, so I think it was not meant for a cheap sink!  Either that, or the plumber wasn’t very good. I somehow think the latter, given our bathroom tap has done the same thing. Oh well. It’s our temporary kitchen.

We’ve worked in it for 2 years now and it’s a pretty good kitchen. It’s small but well formed, but there can only be one person in the kitchen at a time, and our friends and kids have a habit of hanging IN the kitchen with us. Not really enough room for lounging about! I like the open shelving, and even though it looks busy in the photo, actually I think I prefer the open shelves and the homey clutter. It’s not easy to keep things clean, though, so we have to rinse items before using them, as our house gets super dusty. I hate the stove and the alcove and want something much more open, but there is time and space to do this later. For now though, I hold my breath that the stove won’t die on us. If it does, it means rewiring the ENTIRE HOUSE. Which we can’t really afford, and which means doing the entire house in a hurry. Not my idea of responsible home ownership.